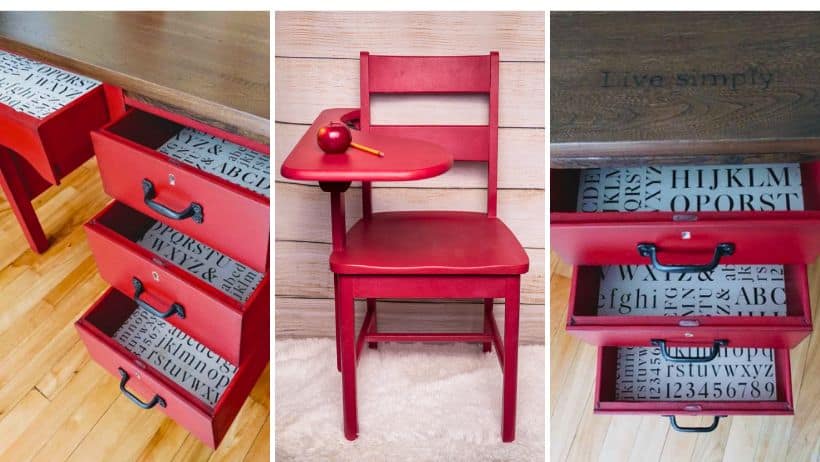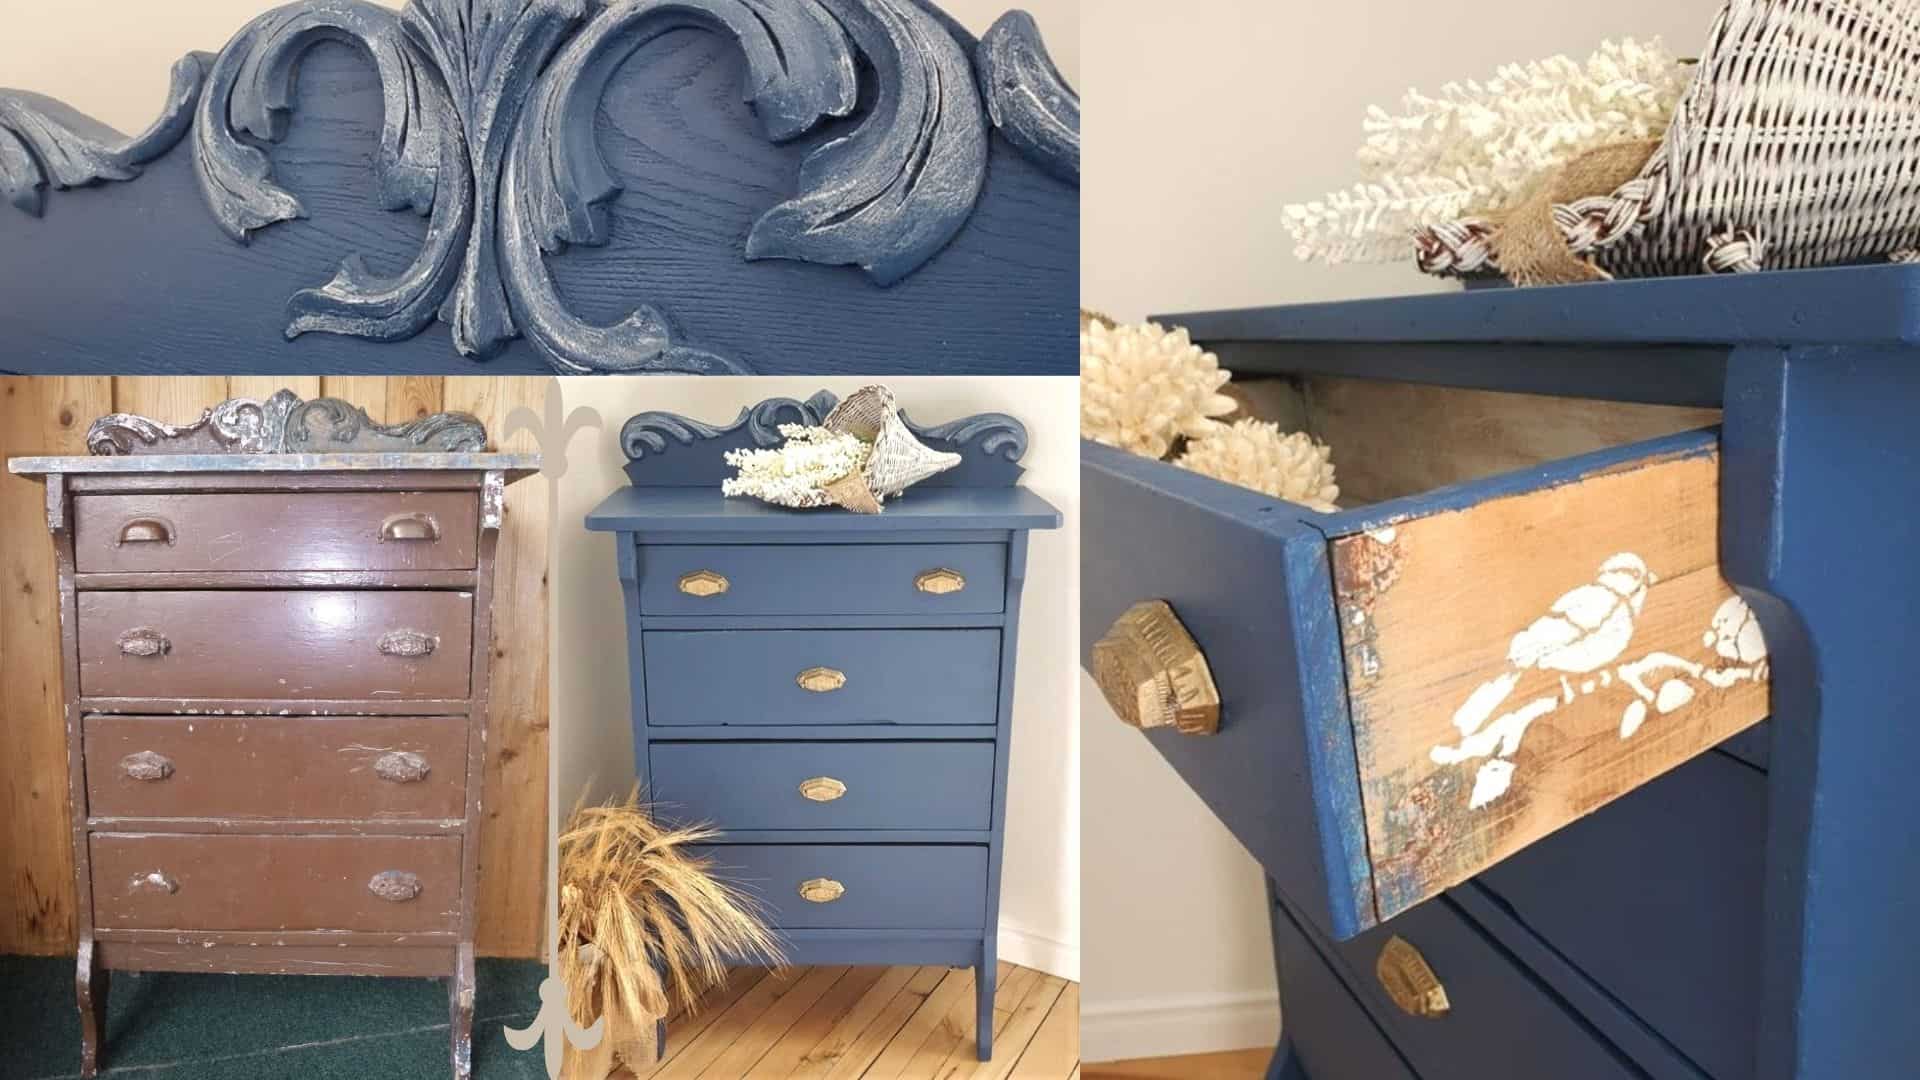
Transformation of furniture with ornamental detail
One beautiful Saturday in May 2015, my husband and I were browsing garage sales to find the rare gem with ornamental detail, and that’s when his eyes were drawn to an object hidden behind a table littered with items for sale. So he slipped behind it to find a beautiful little chest of drawers. Happy with his discovery and knowing my great passion for the restoration of furniture and various objects, he, therefore, hastened to show me his find.
Despite its great lack of love, when I saw it I fell in love with it, I was won over by its unique curves and details. Very disappointed to learn that it was not for sale, my husband finally managed to negotiate it for the modest sum of $20, you can guess my enthusiasm.
Being the owners of a century-old house, we have a particular attachment to old furniture, and some of them need upgrading to come back to life again, such was the case with our little chest of drawers.

The products used
- Circa furniture stripper for the header and handles
- Wood filler
- Gold spray paint
- Oil Primer (because the furniture was painted with oil paint)
- White cotton linen cloth (T-Shirt style)
- Blue shop roll of paper towels
- Stencil of your choice
- Orbital sander
- Sandpaper (grit 80, 120 and 220)
- Drill
- Cleaner and Varnish Remover
- Colorantic colour Summer Storm
- Natural Beeswax and White Snow Wax
- Synthetic purple oval brush (for painting)
- XL round brush (for paint and wax)

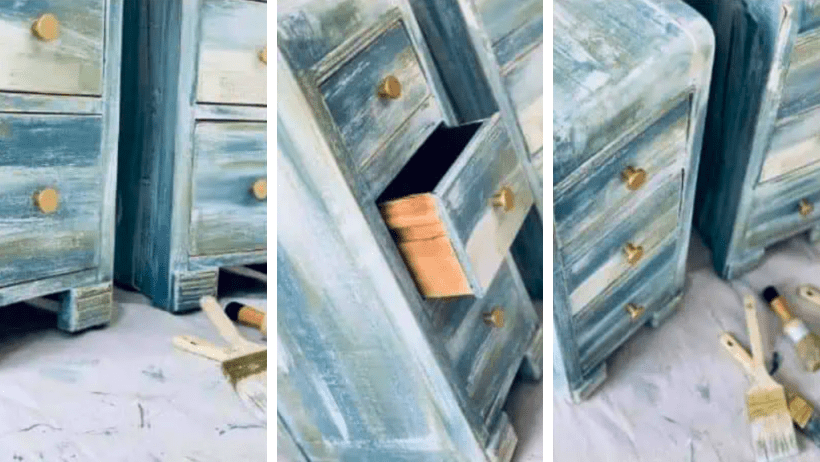
Phase 1 – Preparation of the furniture
- Remove drawers and handles
- Lay the piece of furniture flat on a large canvas to be able to strip it as well as the header
- Sand the furniture starting with 80 grit paper and finish with 120 grit paper
- Spray the furniture with Cleaner and Varnish Remover, spread it with a cloth and leave it to work for a few minutes
- Be sure to rinse well with water to remove all residue;
- Apply the Oil Primer and respect the drying time.
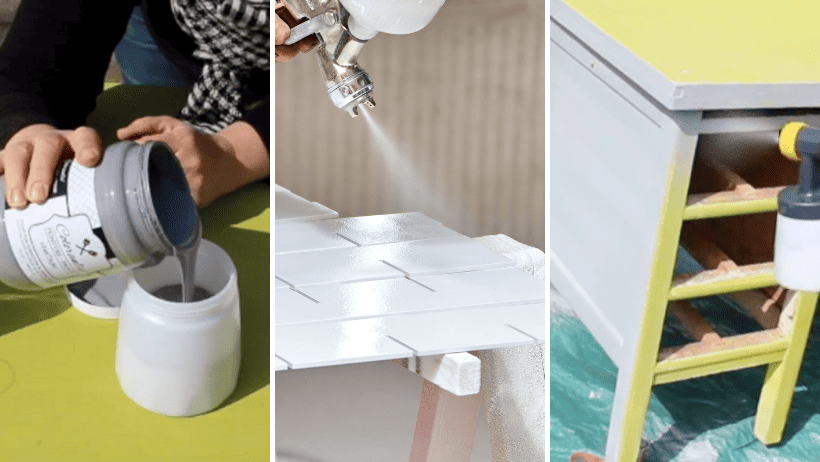
Phase 2 – Painting
You are now ready to apply the first coat of paint. If necessary, sand very lightly between coats with 220 grit sandpaper.
Phase 3 – Surface protection
- Allow the paint to dry very well before waxing;
- With the large round XL brush doing a small section at a time, apply a layer of Natural Beeswax all over the furniture including the header;
- Wipe well with the paper towel.
Phase 4 – Finishing Touch
- With the white cloth and your fingertip, apply the White Wax to the desired places on the wooden ornaments
- Strip the handles and paint them with gold paint
- Fill the old handle holes with the wood filler and sand lightly
- Drill new holes to reposition the handles


After five years of waiting and some great ideas in mind, I decided to paint it with ease and bring out the richness of its magnificent curves. In all its glory, it beautifully adorns a corner of our guest room.
Diane Lavoie
Blogger
Related Posts