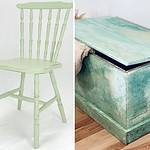
Gradient color technique
Before even thinking about your project, you’ll need to choose the piece of furniture you’d like to transform. What to do? First of all, choose a piece of furniture for its style and overall look.
Enhancing a bland piece of furniture that contains no elements to make it stand out from the crowd may seem a complicated task, but it can be made easy by applying a number of different techniques. Learn here how to add a touch of brightness and impact to your lifeless furniture, simply by using a gradient shade technique.
You don’t have to be a pro to create a magnificent color gradient that will completely transform a vintage piece of furniture you’ve grown tired of. A few precautions are necessary for success, but it’s much easier than you might think. It’s up to you!
The products we use
- Colorantic cleanser and make-up remover
- Wood pulp
- Sander
- 80 grit sanded paper
4 Colorantic brushes
(1 for each color and 1 sec)
Foam brushes
Colorantic- Water sprayer
- Drill
- Choice of dyes
- Colorantic chalk paint: Vintage Cream
- Colorantic metallic paint: Bijou Métallique
- Colorantic Matte Varnish
- Colorantic natural beeswax
- Colorantic Black Charcoal Wax
Preparation
Once you have the right materials, it’s time to prepare the surface.
Start by cleaning and degreasing every nook and cranny of your furniture to remove all dirt and dust. Cleaning is an essential step before starting to paint. If you can dismantle your furniture and remove the handles, it’s even better for this phase.
- Clean furniture and drawers using Colorantic varnish cleaner and remover. Spray all surfaces and leave for 30 minutes. Once the time has elapsed, be sure to rinse twice to remove all residues.
- Use wood putty to fill the holes in the handles if you wish to change them.
- Use a sander with 80 grit sandpaper to sand the frame of the furniture.
- Use a foam brush and the stain of your choice to stain the frame. Follow the manufacturer’s recommendations in terms of coats and drying time.
- Insert the drawers into the cabinet frame.
The paint
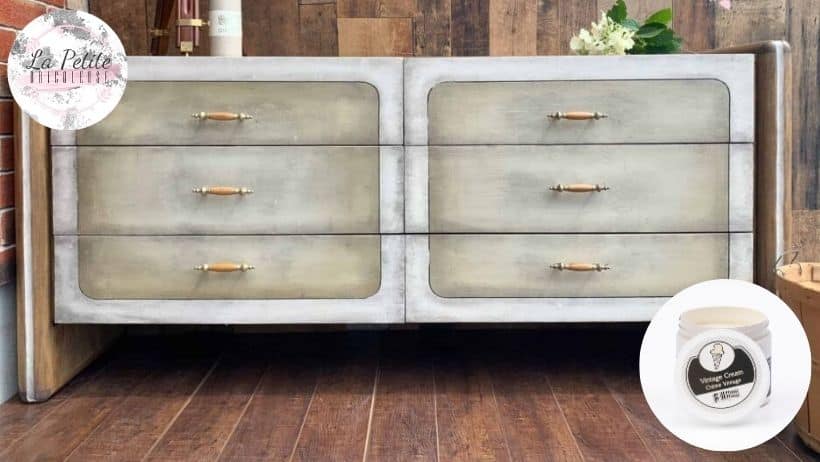
- Apply one or two coats of Colorantic Vintage Cream paint, respecting the drying time between coats.
- During the drying time, mix half and half Vintage Cream paint and Metallic Jewel paint. You should obtain a color similar to light brown.
- Apply a third coat of Vintage Cream and, before it dries, trace a circle around the drawers with the Vintage Cream and Metallic Jewel mixture.
- Do not paint the inside of this circle, as it will be the focal point of the drawer. Using the dry brush, sweep the paint in horizontal, vertical and diagonal strokes towards the outside of the circle to even out the paint. To ensure a beautiful finish, repeat your sweep a second time.
- Lightly add paint to the sides of the circle, using the mixture you’ve created and always making sweeping movements in all directions. This time, however, sweep inwards with the paint-covered brush, then repeat the sweep with a dry brush without paint. This will soften the finish and make the transition between colors more pleasant and subtle.
- Use Bijou metallic paint on the edges and corners of the drawers at the ends. Once again, move inwards horizontally, vertically and diagonally to blend the different paint shades.
- Make a second circle about the same size as the first with the paint mixture. Sweep outwards in all directions to soften the transition between colors. You can also lightly iron inside the circle, then use your dry brush to repeat the process.
- Use a small amount of Vintage Crème paint to make a dot in the center of the drawers, then apply the paint mixture in a circle around this dot. To blend them well, repeat the sweeping movements with your brush. If necessary, use your dry brush to soften the finish.
The finish
- Apply Colorantic matt varnish over the entire cabinet.
- Apply natural beeswax to the drawers and Colorantic Charcoal Wax to the edges and ends of the drawers and around the handles to add an antique effect to the furniture.
- If necessary, use a drill to make the holes for your handles and install them.
So, by using a few colors and gradating from light to dark, you’ll be able to add a wonderful touch of light and impact to any flat surface.
You can use any color you like, but the effect will always be striking. Just be creative!
The little handywoman
Karina Mc Sween
Blogger
Facebook: https://www.facebook.com/La-petite-bricoleuse-Revalorisation-de-meubles-et-dobjets-101063858371871
Instagram: https://www.instagram.com/atelier_la_petite_bricoleuse/


