Introduction
Aménager un nouvel espace de travail au centre du rez-de-chaussée et l’harmoniser au décor actuel n’a pas été une tâche facile.En vain, durant plusieurs mois j’ai fait des recherches ici et là afin de m’inspirer. Je désirais y intégrer un beau look ancien.
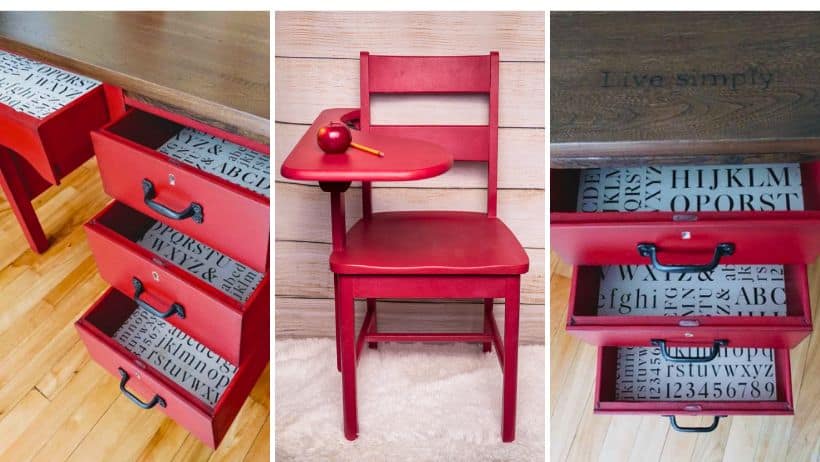
C’est finalement en apercevant une planche de bois d’épinette en liquidation chez Rona que les idées ont soudainement jailli.Quelques heures plus tard, je rentrais à la maison avec une planche, un nouveau classeur et de belles poignées, j’étais enfin prête à commencer mon nouveau projet.
Celui-ci s’est amorcé avec la mise en place de la planche d’épinette et la revalorisation du classeur.
")
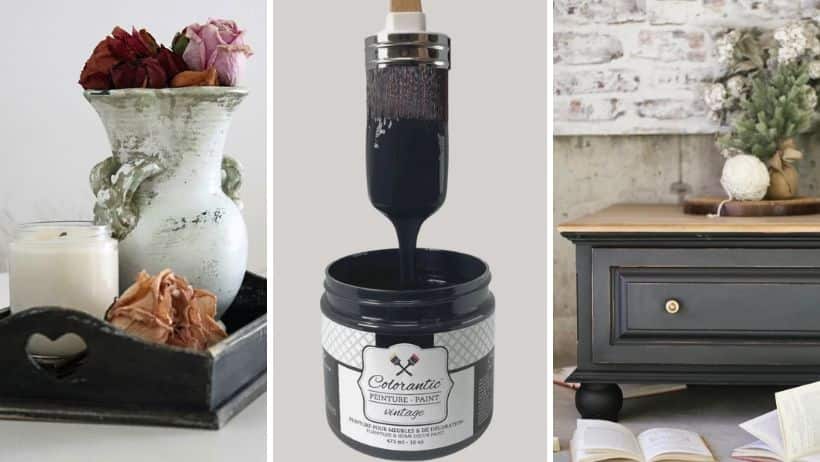
Les produits utilisés pour créer notre look ancien
- Nettoyant et démaquillant à vernis Colorantic
- Apprêt agrippe-tout à l’huile Colorantic (il très important d’utiliser l’apprêt à l’huile pour la mélamine)
- Peinture Nuit
- Cire naturelle d’abeille, Charbon noir et Brune antique Colorantic
- Rouleau mousse Colorantic
- Pinceau en soie 55mm, 16mm & rond XL pour la peinture Colorantic
- Bloc de sablage deux grains Colorantic
- Papier à poncer grain 100 et 120
- Nettoyant granulaire à mains et brosses Colorantic
- Essuie-tout bleu pour usages multiples
- Chiffons genre t-shirt
- Une bouteille d’eau en vaporisateur
")
Préparation du meuble
- D’abord retirer les tiroirs et les poignées.
- Ensuite retirer les roulettes du classeur et les remplacer par de petites pattes de bois, celles-ci ont été fabriquées maison.
- Alors asperger le nettoyant et démaquillant à vernis sur le meuble et les tiroirs, bien l’étendre sur toutes les surfaces à l’aide d’un essuie-tout, laisser agir durant 30 minutes.
- Puis très bien rincer pour retirer tous les résidus.
- Et appliquer la couche d’apprêt en utilisant le rouleau mousse et respecter le temps de séchage recommandé.
- Par ailleurs j’ai préféré conserver les pattes au bois naturel.
Peinture et création du look ancien
- Vous voilà donc prêt à appliquer la couleur Nuit à l’aide du pinceau en soie 55mm, respecter le temps de séchage.
- Au besoin appliquer une deuxième couche de peinture, vous pouvez asperger un peu d’eau sur le pinceau pour faciliter l’application.
- Faire l’usure à l’aide du bloc de sablage, des différents papiers à poncer et d’un chiffon humide (t-shirt).
Protection de la surface
- Laisser sécher la peinture durant 24 heures avant de procéder au cirage.
- Le lendemain, à l’aide d’un pinceau rond 16mm appliquer de la cire naturelle d’abeille sur les parties usées et l’essuyer à l’aide d’un essuie-tout ou d’un chiffon (t-shirt)
- Sur une partie à la fois, appliquer la cire charbon noir sur toutes les surfaces et bien l’étendre à l’aide d’un essuie-tout ou d’un chiffon (t-shirt).
- En utilisant un pinceau 16mm, accentuer les endroits usés en appliquant de la cire brune antique et frotter très légèrement à l’aide d’un essuie-tout ou d’un chiffon (t-shirt).
- Soyez rassurés, car si vous n’êtes pas entièrement satisfait du résultat, il est toujours possible de corriger les nuances en réappliquant de la cire naturelle d’abeille, et vous pourrez ainsi recommencer.
- La cire peut prendre jusqu’à 30 jours à durcir.

Performing major renovations may also require giving a new function to an existing room. This is what happened to us when we decided to expand the living room by using the adjoining multifunctional room, in which there was an office space. It is pure joy to work in this new environment, and Colorantic once allowed me to customize it to our needs.
Diane Lavoie
Blogger
Related Posts