How to Refinish an Anqitue Window to Creat and Original Piece
Have you ever wondered how to refinish an antique window to use as decor in your house? Here’s how I did.
Even before the kitchen renovations started, my head was full of decorating ideas.
On the wall above the island, I dreamed of having shelves. Since I love the originality as well as the process of refinishing, I wanted to revamp the old hutch from our dresser.
However, the installation of a pocket door weakened this wall, so it was no longer possible to install the heavy hutch. For a few months, I was looking for an original item that would lend a lightness to the dark kitchen.
Then, while rummaging through our treasures, my husband had the brilliant idea of salvaging an antique window from our century-old house and adding a shelf to it.
![]()
Products Used
- Colorantic Chalk Based Paint: Cotton Ball
- Colorantic Chalk Based Paint: Tractor Dust
- Colorantic Natural Beeswax
- Colorantic Round Brush XL
- Colorantic Round Wax Brush 16 mm
- Colorantic Sanding Block – Medium and Heavy Grit
- Colorantic Mango Soap for Paint Brushes/ Hand
- Colorantic Oval Synthetic brush
- Black Spray Paint
- Cotton Rag
- Green Painter’s Tape
- Spray Water Bottle
![]()
How to Add a Shelf
To avoid weighing down the window, he opted for basswood, which is a very light wood.
Then, he gave it an aged wood look by using different tools.
Finally, we chose planter supports to attach it to the window.
![]()
Step 1: Preparing the Antique Window
First, I removed the old peeling paint with a stiff brush.
Then, I dusted it off really well using an air compressor removing the dirt accumulated in all the crevices.
Once the painter’s tape was applied, I was ready to start painting.
Step 2: Painting the Antique Window Frame
Afterwards, I used a small amount of the Cotton Ball colour diluted with a little water to thin it out (I always prefer to work small amounts at a time to not waste the paint).
Using the #10 oval brush, I applied the paint lightly and randomly in order to reveal the grayish natural wood of the window frame.
When I was finished painting, I used a damp cloth and wiped some of the paint away in some areas until I got the desired worn effect.
After the paint was completely dry, I sanded lightly with my sanding blocks to give it a worn effect .
Too much wear … no problem, add more paint!
Step 3: Painting the Shelf
Before painting the shelf, I brushed it gently with a steel brush. I sprayed a little water in some areas to bring out the grain of the wood and accentuate the aged effect.
Next, to achieve the natural grayish colour of the window, I applied one coat, Tractor Dust, all over using the #10 Oval Brush.
Before the paint dried completely, I sprayed some more water and applied a coat of the colour Cotton Ball horizontally, and then blended the two colors using my paintbrush.
Using a damp cloth I wiped in a few places to bring out the grey.
Step 4: Applying the Stencil
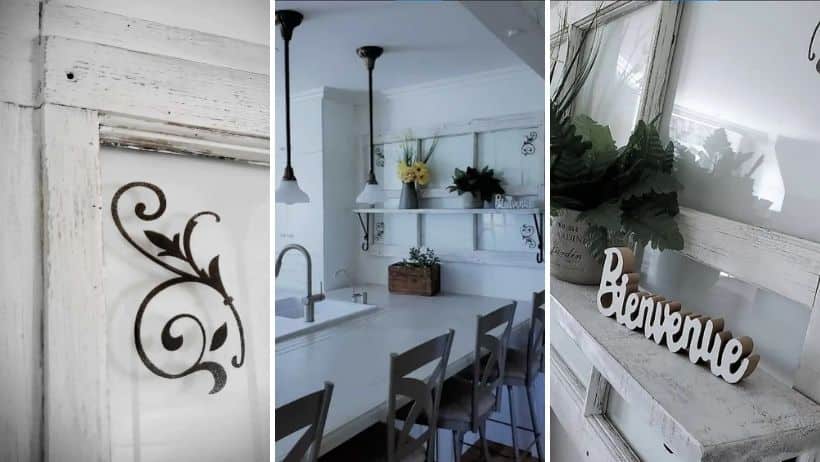
In addition, on the back of the window, I applied the stencil and taped it very well using the painter’s tape. At a distance of about 12 inches, I sprayed the black spray paint, taking care to spray lightly to avoid the paint from running.
The Final Step
Finally, using the XL round wax brush, I applied the Natural Beeswax to all the surfaces and polished it using a rag (an old t-shirt).
The Final Result
I’m really proud of my husband’s brilliant idea to refinish an antique window! The window is a wonderful focal point and gives my kitchen that WOW factor.
I love styling it with the seasons. It always looks beautiful.
Refinishing and Colorantic, the perfect combination for personalized original decor ideas.
Diane Lavoie
Blogger
Related Posts