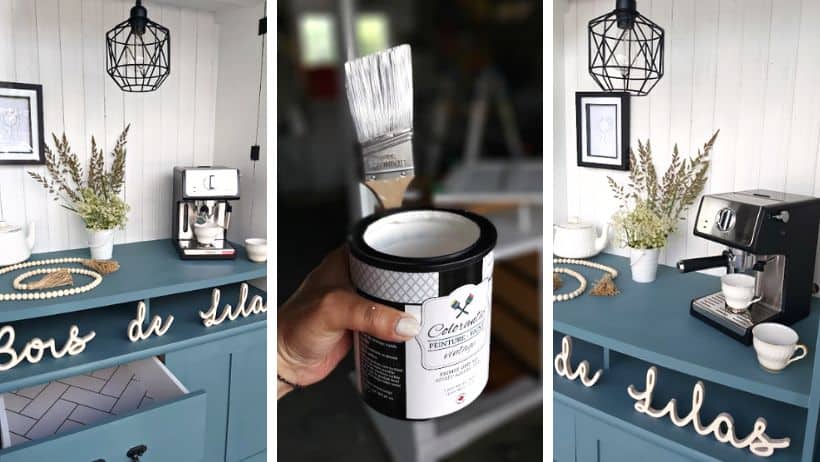
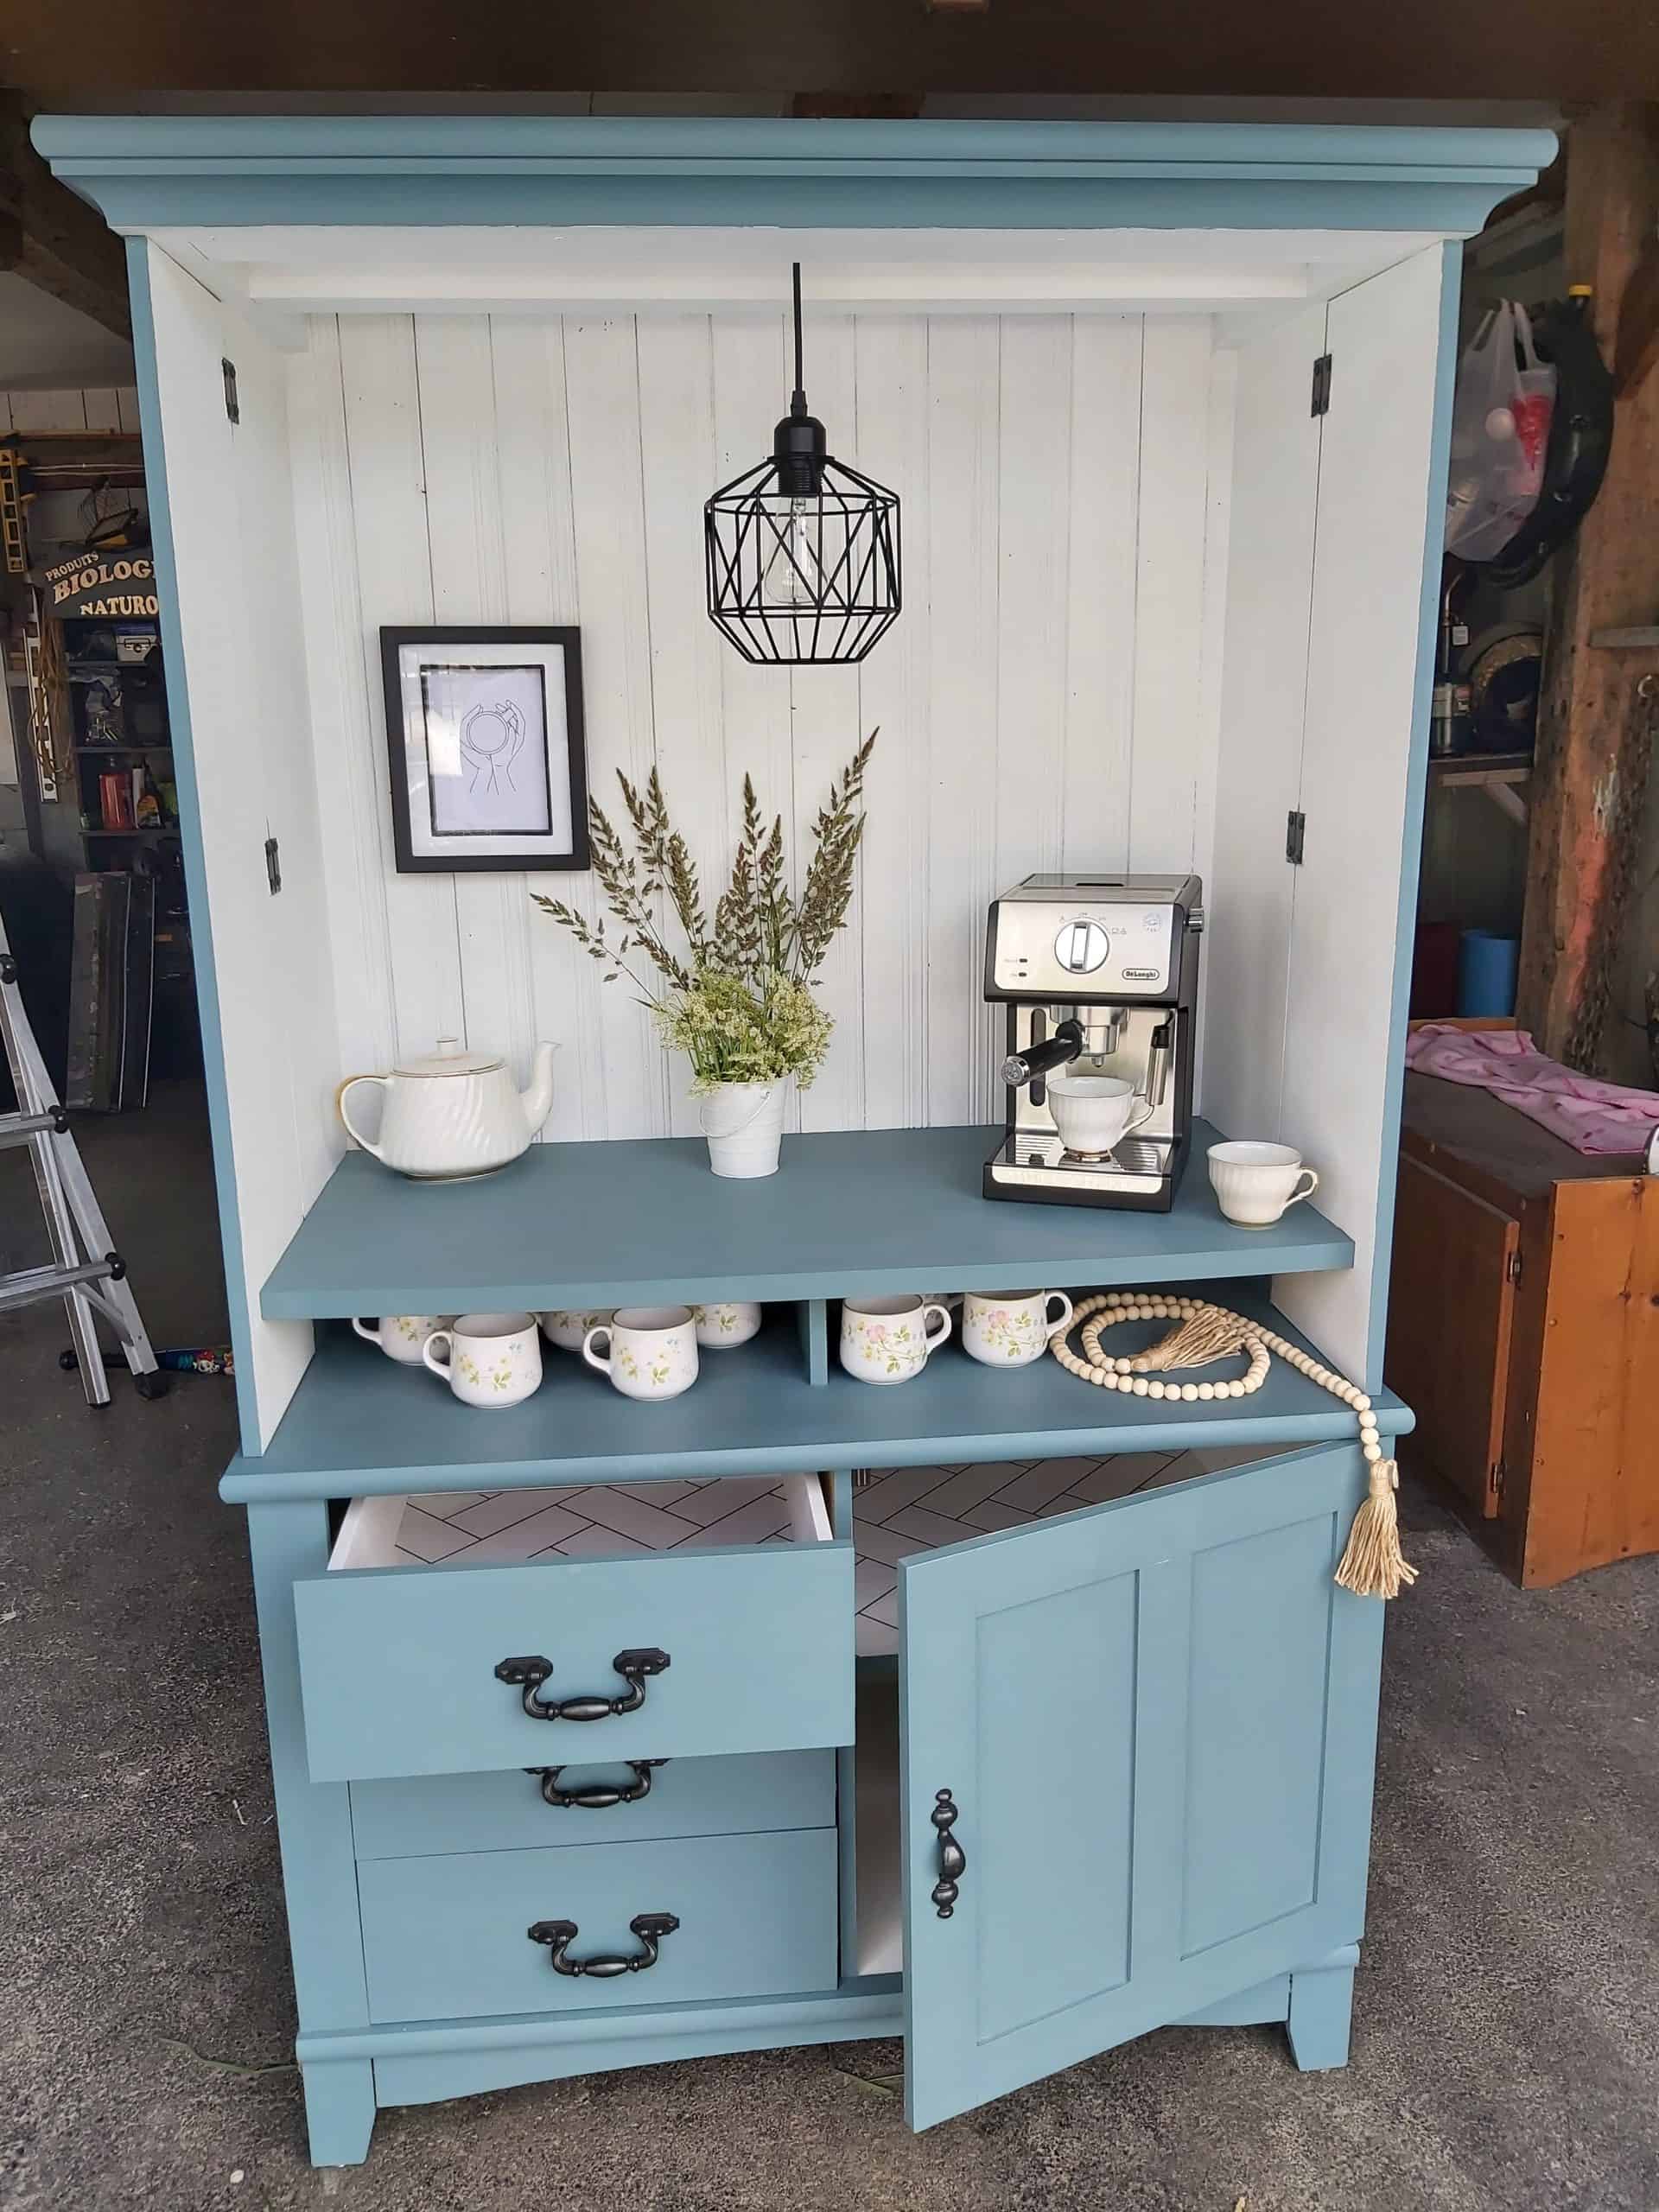
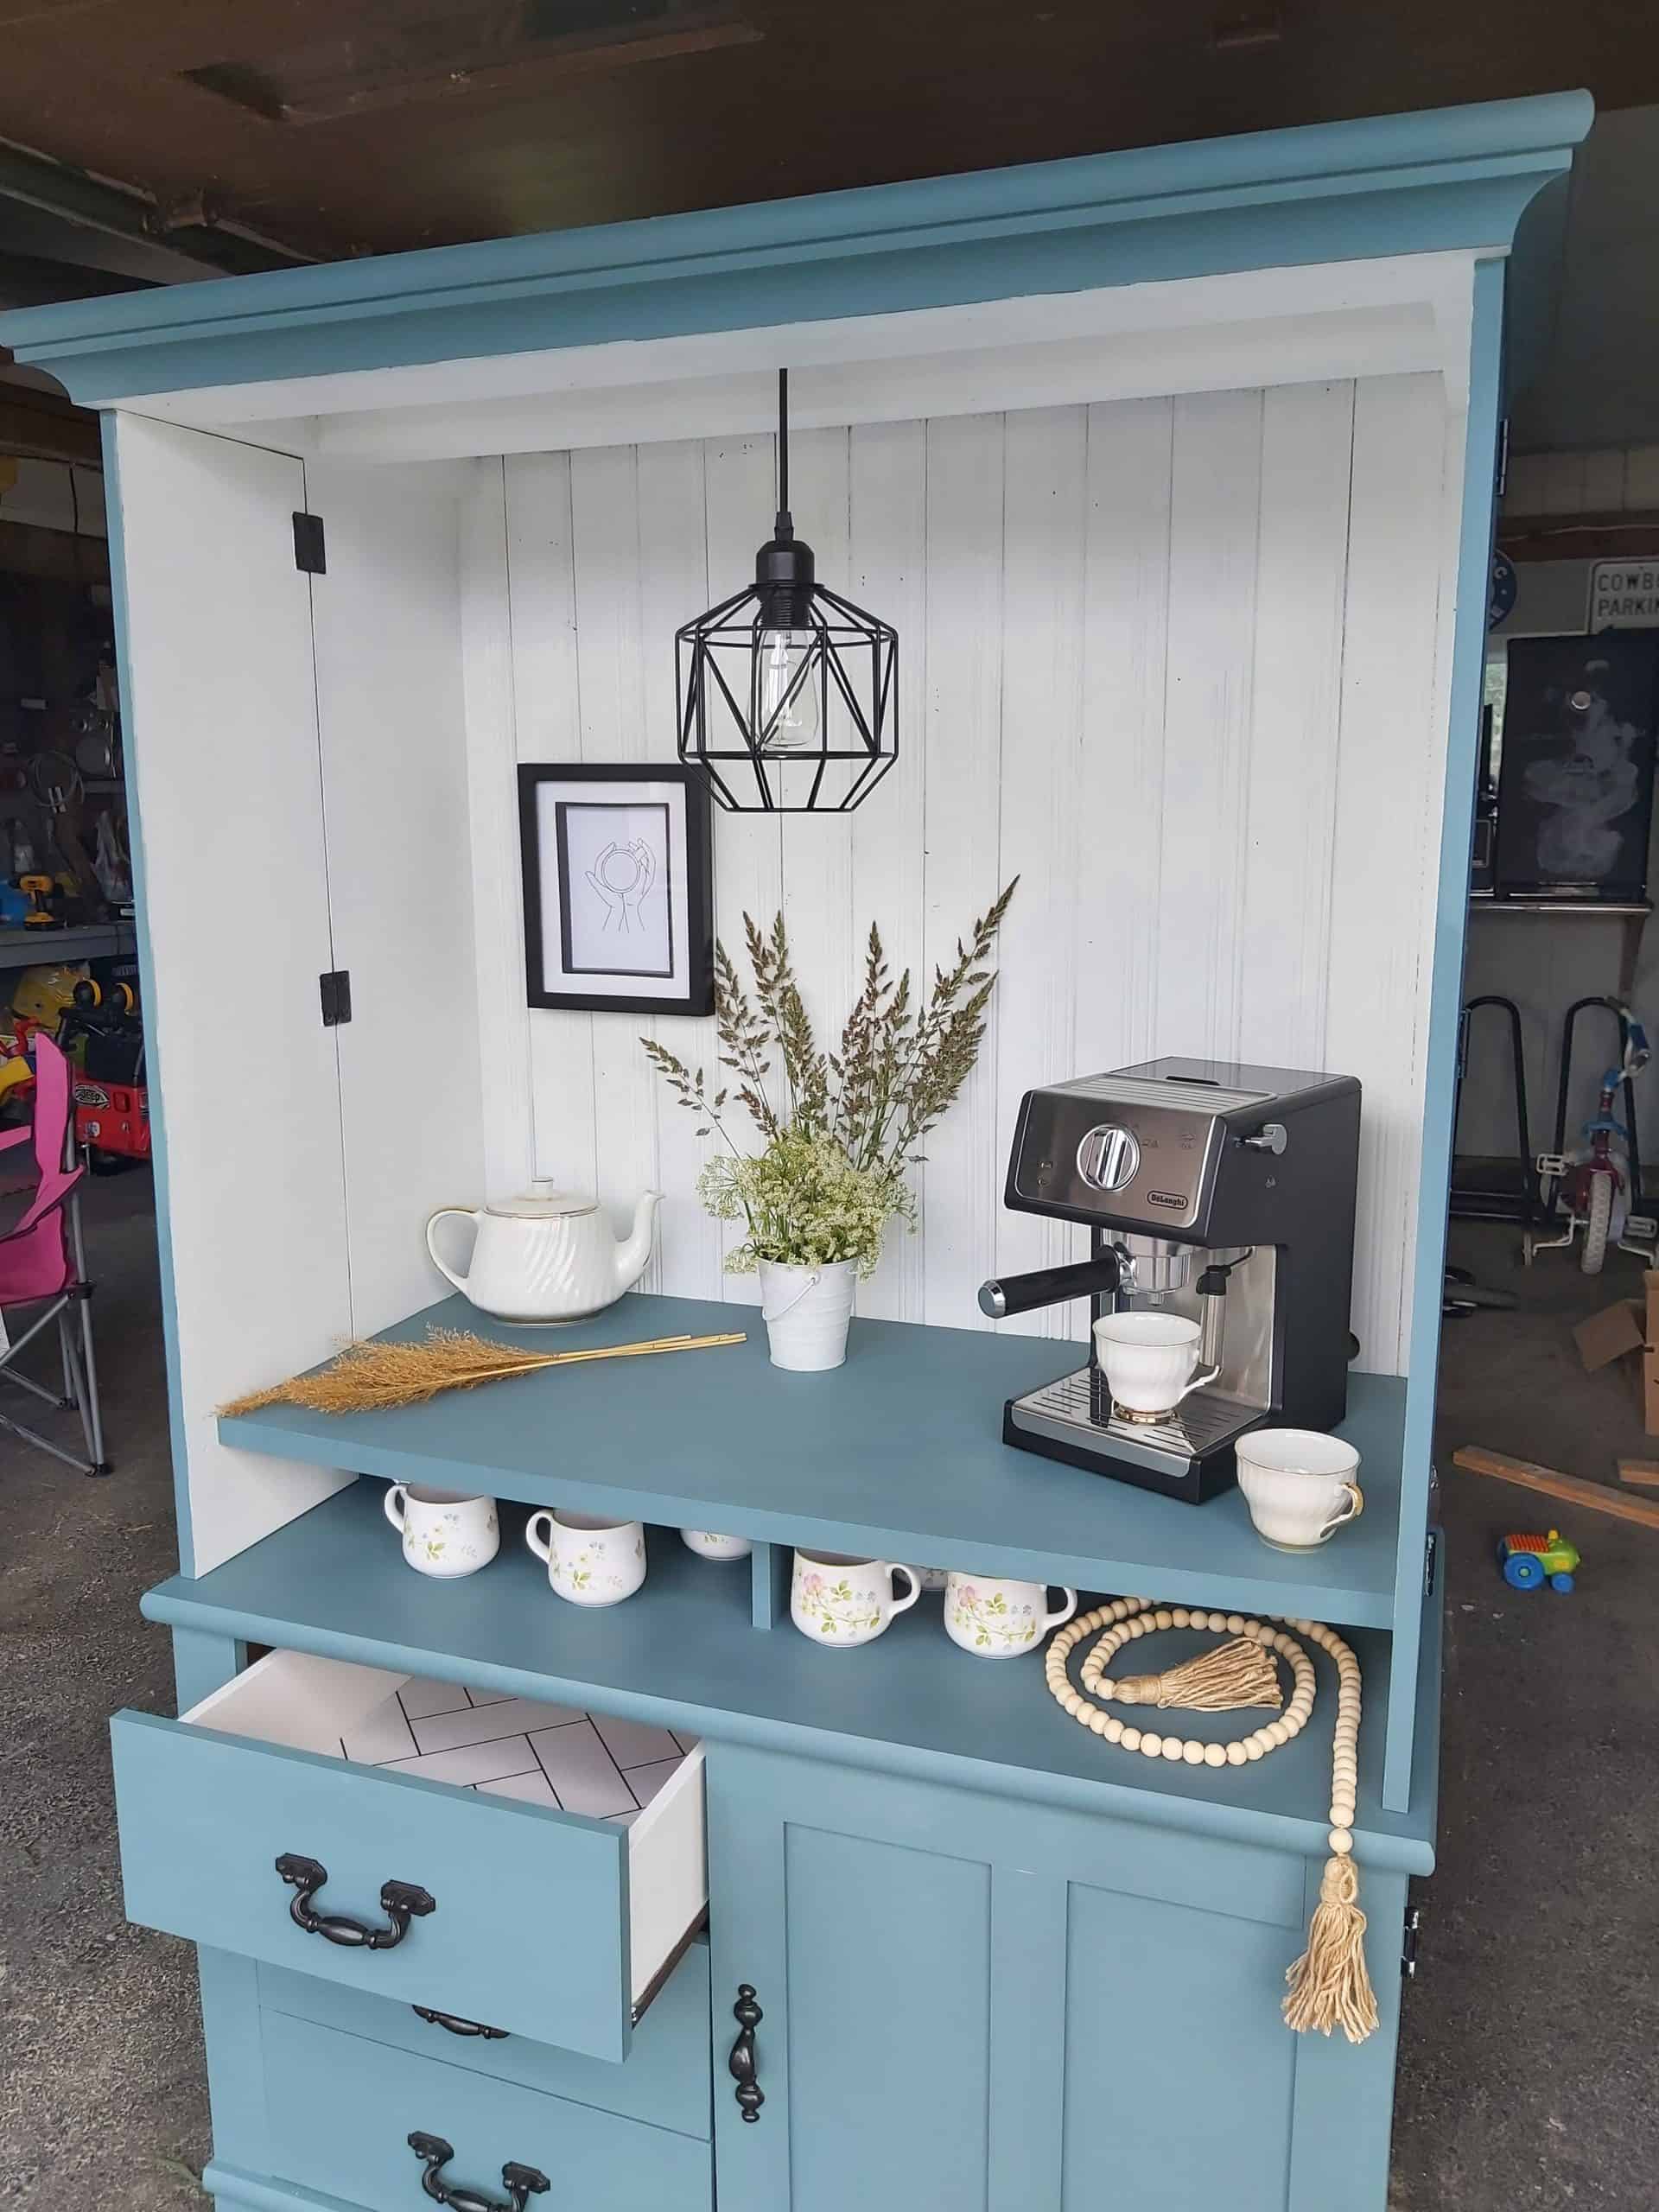
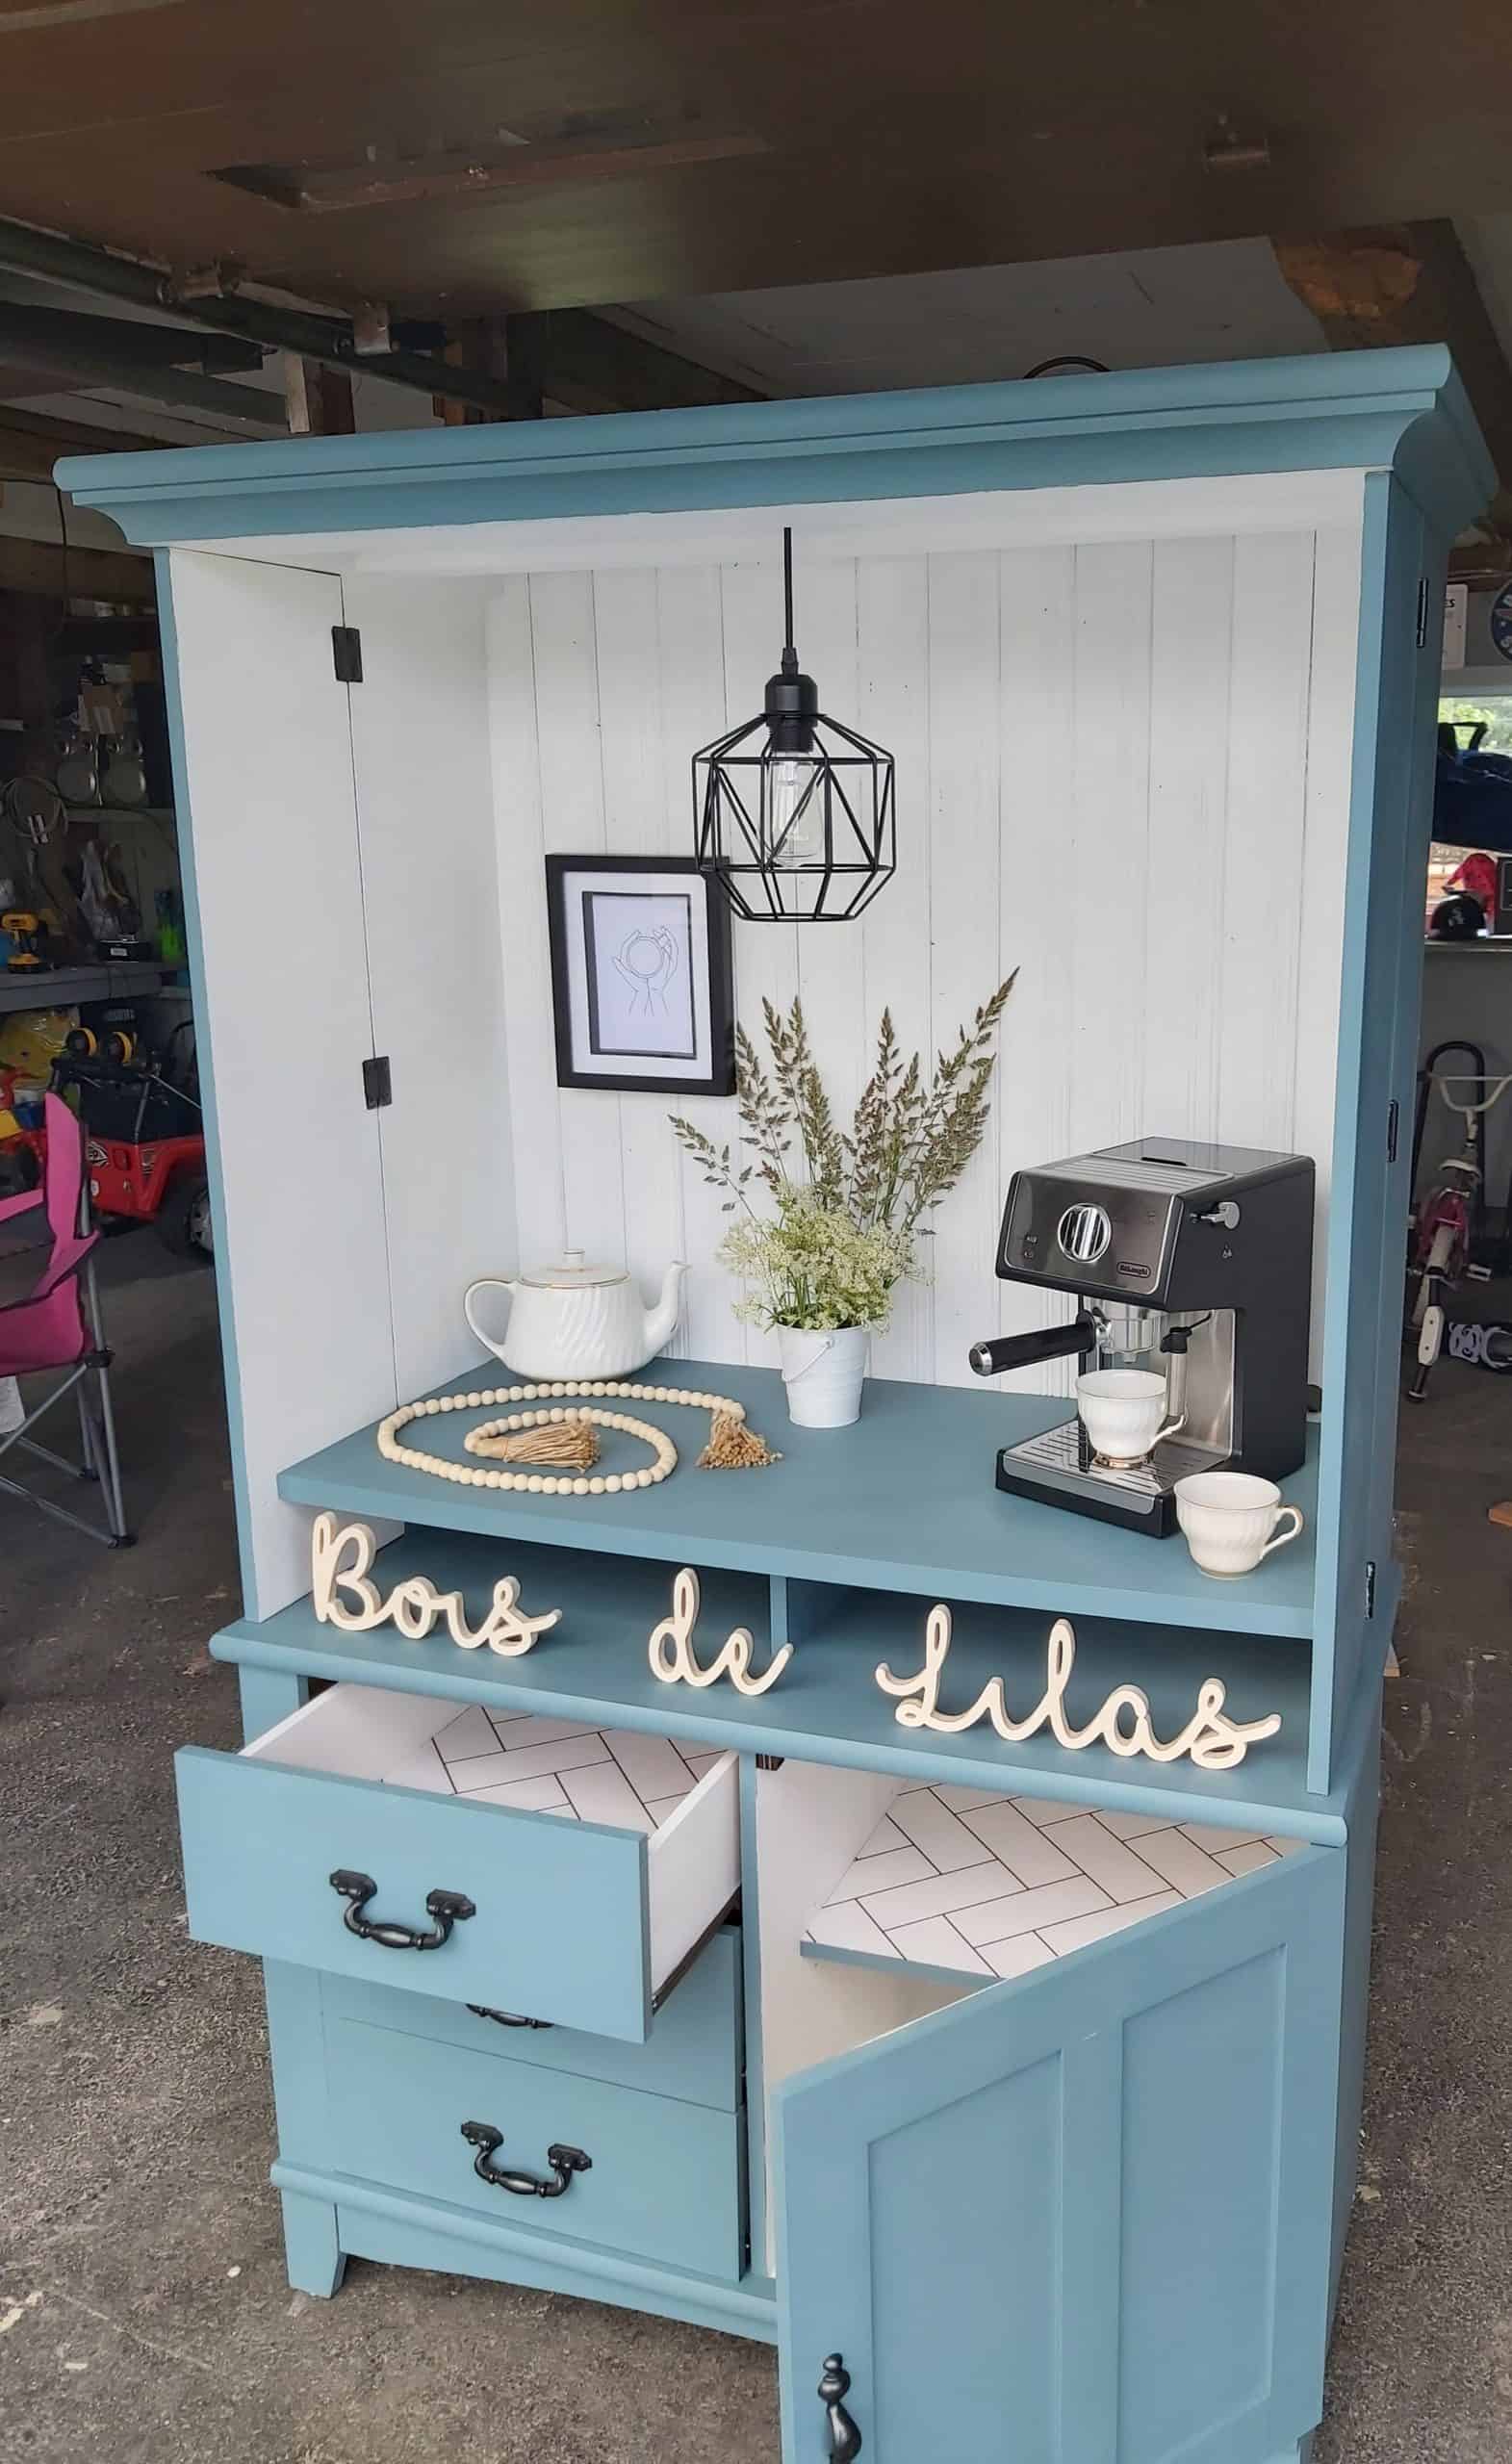
In recent years, the “Coffee Bar” has become a big trend and many people want to have their own. We see many models, each as inspiring as the next. For a long time, I had been searching for an attractive and affordable piece of furniture that would allow me to create a “Coffee Bar” that would undoubtedly appeal to my customers. Already having the ideas in mind for the transformation, it was when I saw this TV stand in the classifieds, and close to my house, that I knew that I had just found the rare pearl I needed for this project of furniture retoration.
When Colorantic released their new chalk paint colour, Zen, I fell in love with this beautiful colour. When I saw the piece of furniture, I immediately knew that this new colour, which is a favorite, would suit it perfectly.
If you want to create your own “Coffee Bar”, let yourself be inspired by my project!

The Products Used
- Colorantic Matte Top Coat Varnish
- Colorantic Oil-Based Primer
- Colorantic Chalk-Based Paint: Zen
- Colorantic Chalk-Based Paint: Cotton Ball
- Colorantic Velvet Foam Roller
- Colorantic Synthetic Oval Brush #6
- Colorantic Snow White Brush
- Colorantic Sandblasting Block
- Colorantic Granular Hand and Brush Cleaner
-
Self-Adhesive Wallpaper
-
Pneumatic Nail Gun and Finishing Nails
-
Mod Podge
Preparation
This enormous piece of furniture made of melamine was really very heavy. I wanted its new purpose to reveal the interior, so I removed the two large doors at the top.
Once the doors were removed, I prepared all the surfaces well, which in my opinion is the most time-consuming and laborious step, but undoubtedly the most important for a lasting job.
I removed the bottom of the cabinet as well as all the hardware. Then, I cleaned all the surfaces and the handles with the Colorantic Cleaner and Varnish Remover. I left the vaporized cleanser on all surfaces and let it work for thirty minutes. Once the rest time was over, I rinsed twice with warm water to make sure I removed all the residue.
Using the sanding block, I scratched all the surfaces to allow the paint to adhere well. I took care to dust well before continuing my work.
Since the furniture is made of melamine, I applied a coat of Colorantic oil primer so that the paint would stick to it well.
Painting
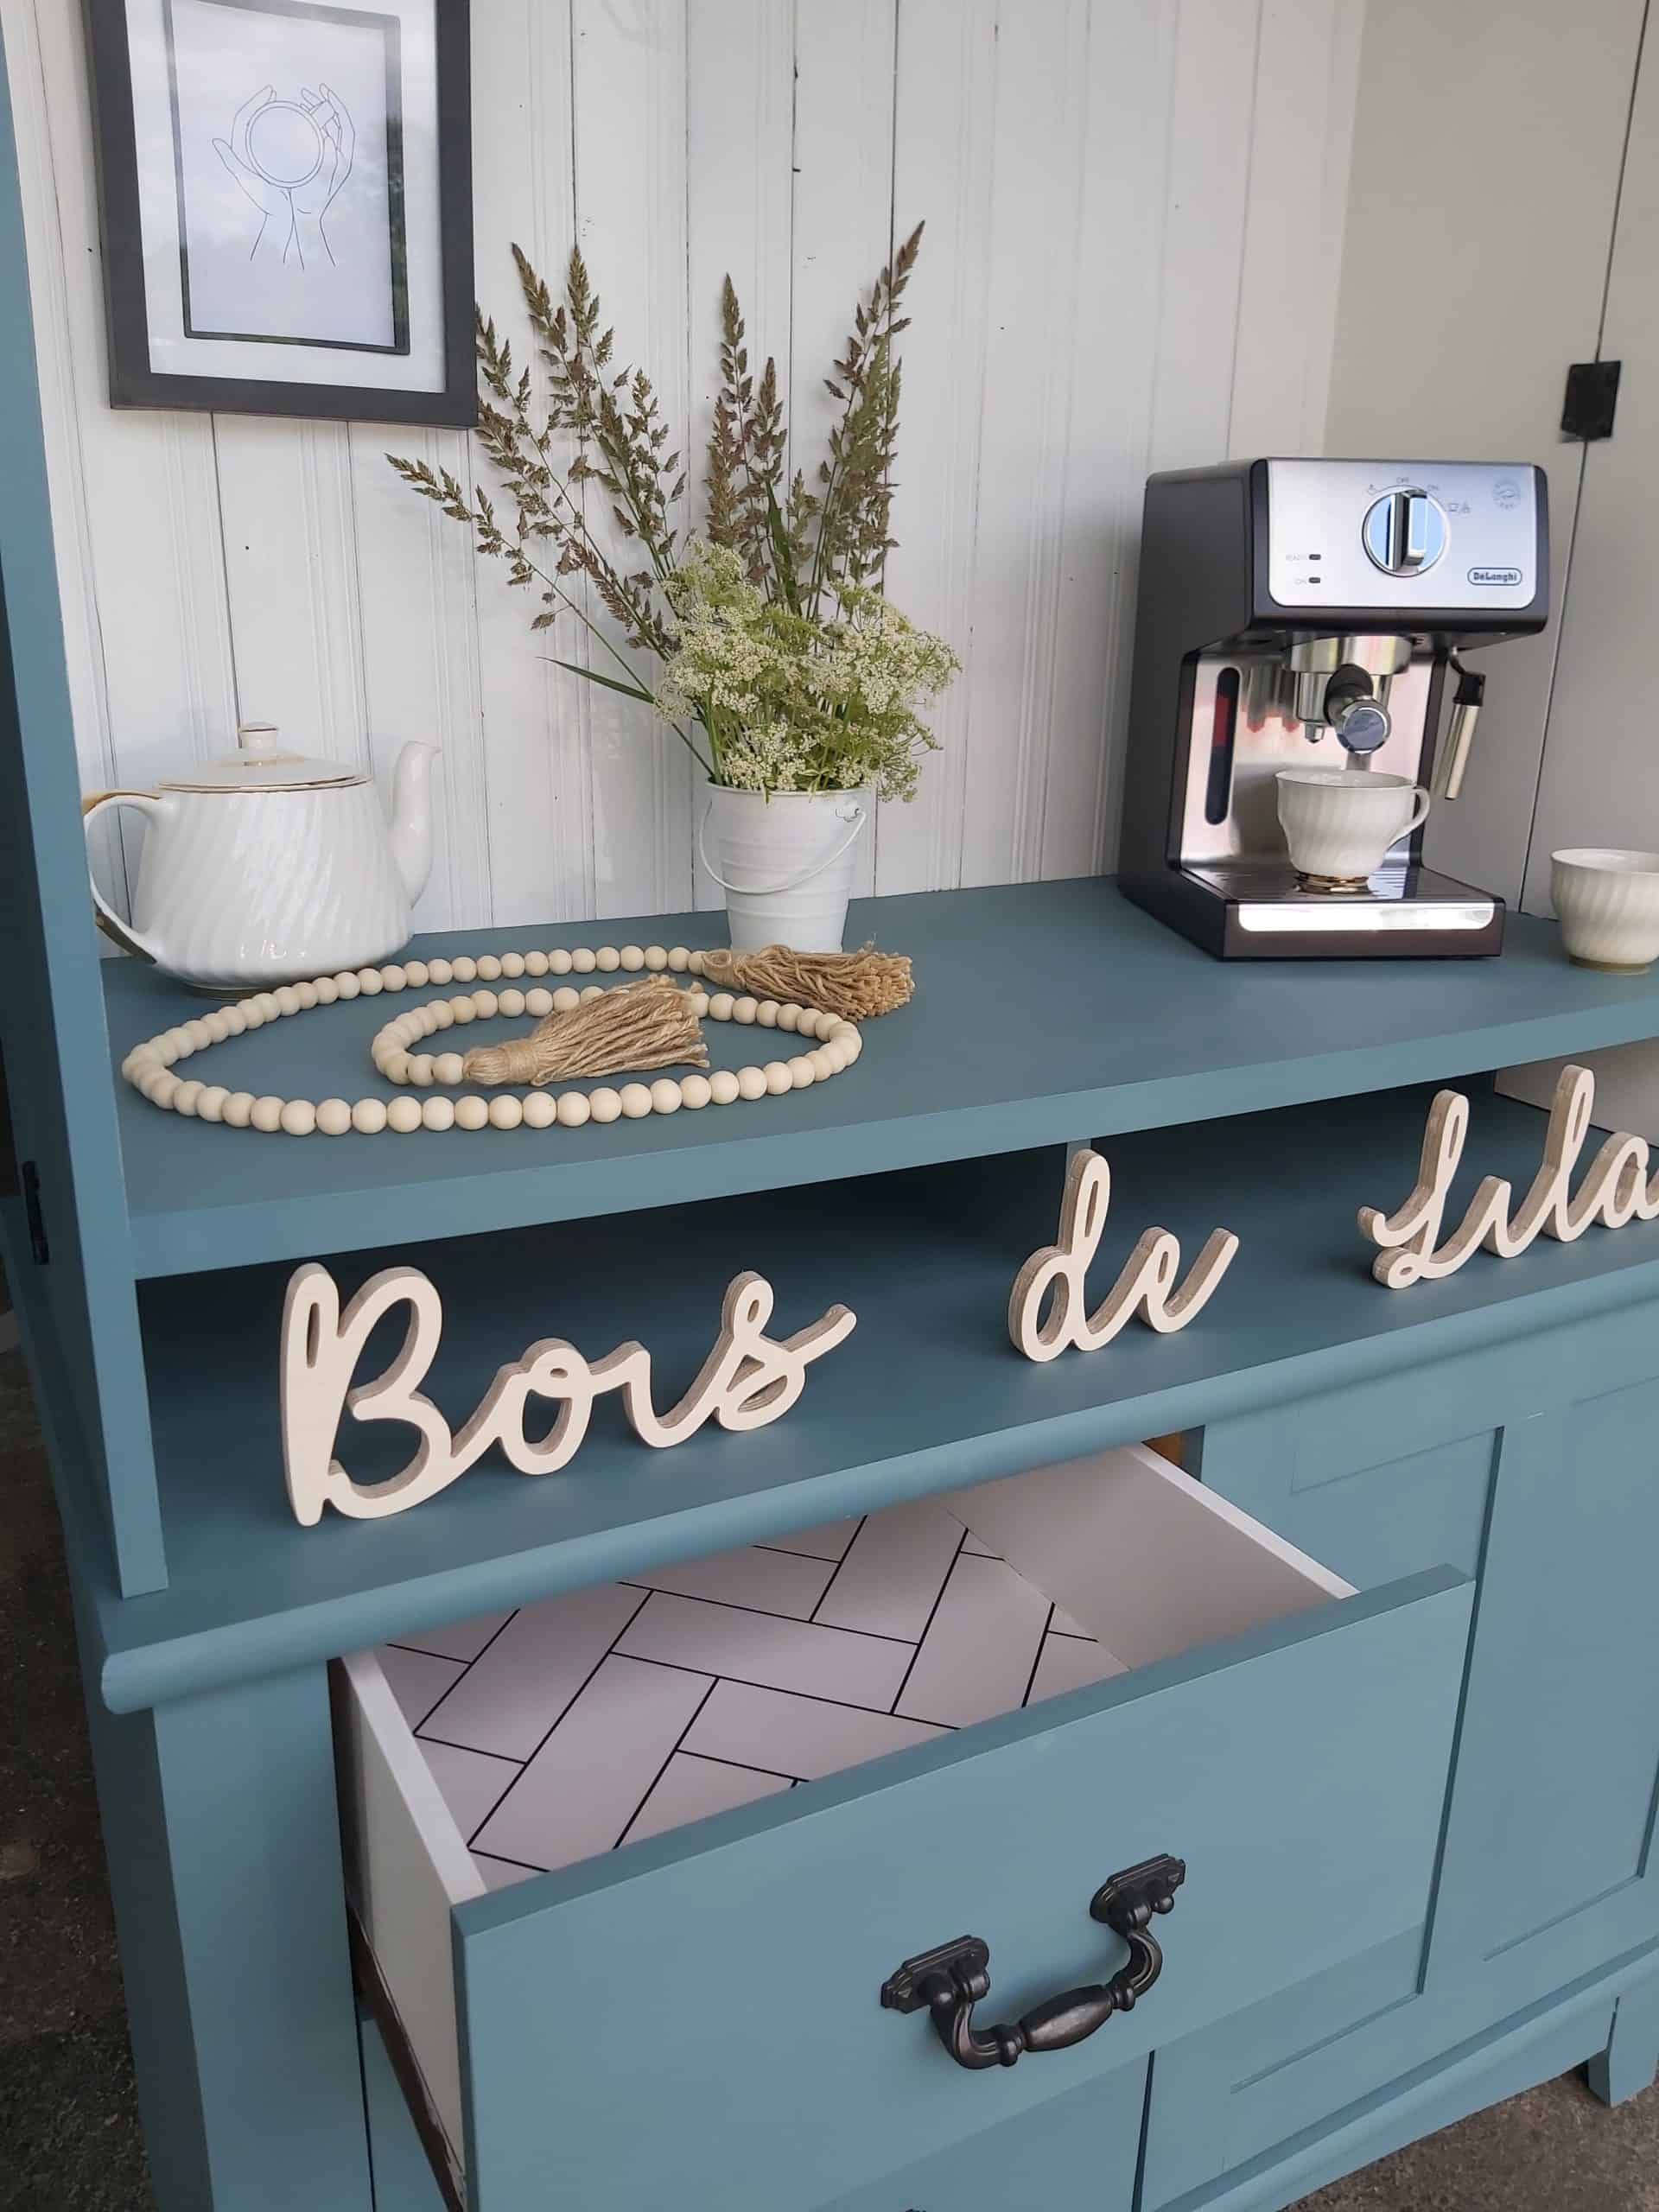
Using the foam roller, I applied three coats of the chalk paint colour Zen, and for smaller areas I used the synthetic oval brush #6. I thought it was important to also paint the top, because, as I did not know in which house it would find its place, we could have noticed this surface of a melamine. I also applied two coats of chalk paint Cotton Ball, on the sides of the drawers as well as on the interior surfaces of the cabinet.
During the drying time, I was able to undertake the following operations:
– Paint the handles black with spray paint
– Measuring and trimming wood slats salvaged from an old bedroom
– Measuring and trimming wallpaper
– Glue and nail the side panels.
For the bottom slats, I applied a coat of oil-based primer and two coats of Cotton ball. I installed them vertically, taking care to glue them well on top of each other and adding two finishing nails at the ends.
Personalization
In order to personalize my “Coffee Bar”, I applied white wallpaper containing a touch of black so that it harmonizes well with the black accessories and handles. For the application of the wallpaper, I previously applied Mod Podge to the surfaces using the Snow White Brush and I also applied Mod Podge to the back of the wallpaper. A cloth and a spatula were needed to remove the air bubbles.
I took care to drill holes to let the wire of the light and that of the coffee maker pass so that everything is visually pleasing.
You have reached the most exciting stage; that of placing the accessories, installing the light and giving free rein to your imagination in order to make your vision come to life!
Here is a video summary of the project. Subscribe to the Youtube channel and like the video!!!
I invite you to consult all the projects of this blogger at the following links:
Colorantic – Manufacturer & Supplier of chalk paintAbout Colorantic :Colorantic is a 100% Canadian business. We manufacture and distribute chalk based paint and otherDIY Products for furniture & craft home decoration.Web site https://colorantic.com/en/Subscribe to our newsletter : At the bottom of the web siteFacebook : / https://www.facebook.com/colorantic/Instagram: / https://www.instagram.com/colorantic/YouTube: https://www.youtube.com/@ColoranticPaintPeintureBlogs https://colorantic.com/en/blog/ |
Related Posts