How to Transform a Mudroom Entrance
Are you always looking for new ideas to change your home decor?
Well, yes, I am constantly looking for new, inexpensive ideas.
Having owned a new house for barely four months, I was already looking for a great idea to revamp the small main entrance which I didn’t like at all, really not having received much love from from the former owners.
I told you I like a cheap change of scenery….Well, out of the blue, an original idea for a really inexpensive project was born.
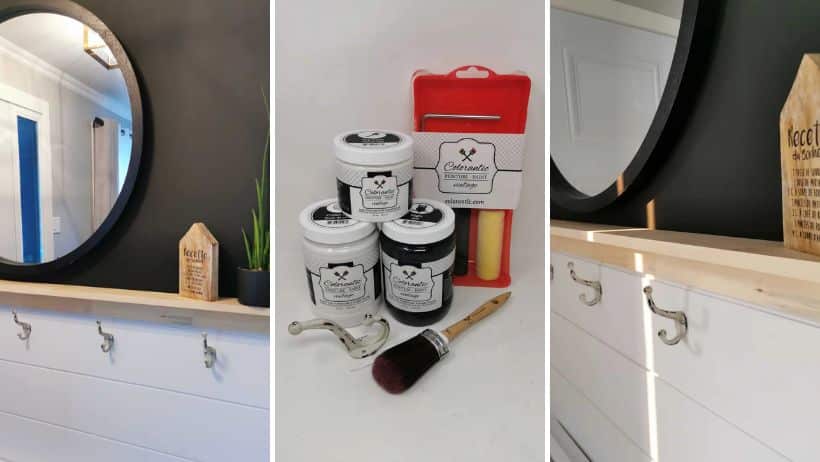
Having a few cans of Colorantic paint already opened, some wainscoting and mouldings, I decided to create a Colorantic signature entryway!!!! Well yes, why not, it is a great idea!
Here are the inexpensive steps involved in my transformation, which, by the way, took a mere three hours of my time to complete, and of which I’m very proud.

List of Products Used
- Colorantic Chalk Paint: Night
- Colorantic Chalk Paint: Cotton Ball
- Violet Oval Brush #6 synthetic Colorantic
- Colorantic Foam Roller Brush
- Colorantic Top Coat Matte Varnish
- Colorantic Decorative Hooks (5)
- Colorantic Granular Hand and Brush Cleaner
- 4″ decorative mouldings (angle-cut)
- Interior MDF wall panelling (one pack of 6 boards was enough for my 62″ wide wall)
- Nailers
- Finishing nails
Transform a Mudroom Entrance
Prepare the Surface Well
The first step, and not the least, is to remove all decorative elements from the wall and plug all the holes. I patched the holes and washed the surface to make sure it was very clean.
Once the surface was well cleaned, I removed the moulding from the bottom of the wall. Next, I measured the width of the wall and cut the six beadboard boards to the length needed. I was very hesitant about leaving the moulding, but ultimately I don’t regret having removed it, because I find that the paneling has more value being installed all the way to the bottom of the wall.
Then, I cut my two corner mouldings of the same length.

The Painting
I’m ready to paint the top of the wall. But before undertaking this step, I took care to apply green adhesive tape to protect the other adjacent walls as well as the ceiling.
As black is my favorite colour and it is my accent colour at home, I decided to add a splash of this shade in my entryway. I was very lucky because I had enough paint, Night, from Colorantic, left over to complete my project the same day. Colorantic chalk paint is a very thick paint and covers very well, so two coats were very sufficient to camouflage the white of the wall.
![]()
Once the painting was finished, I gently removed the tape and when it was completely dry I could begin the rest of the project.
I installed the six wainscoting boards from the ground up. I used a nail gun, but it is also possible to use silicone glue.
I also had some left over Cotton Ball which I used to paint the paneling. I applied two coats of this color directly to the wood paneling.
Since Colorantic paint contains a very slight amount of primer, I therefore omitted adding primer before applying the paint.
***Colorantic paint dries in less than 30 minutes.

Installing the Moulding
Now that the painting is finished and the paneling is installed, all that remains is to install the decorative mouldings.
I cut the two decorative moldings according to the width of the wall. I installed one flat on the wall just above the wainscoting.Then, to give a shelf effect, I placed the second molding on top of the first.
In order for the paint to be washable, given that it is a place very frequented by the whole family, I applied two coats of matte varnish to all of my work.
Since we have five children at home, I installed five white hooks purchased from Colorantic.

Finally…
It was on a rainy summer day that my idea to revamp my little entryway was born, and all this in just a few hours.
With the addition of a few decorative elements, I must admit that I am quite happy with the result!
So here’s an ordinary little entry that became a spectacular space thanks to Colorantic!
Andrée-Anne Lacombe
Blogger

Join our English Colorantic group
Subscribe to our newsletter:
Newsletter
Facebook
Instagram
Pinterest
Etsy
Amazon Canada
YouTube
Tiktok
