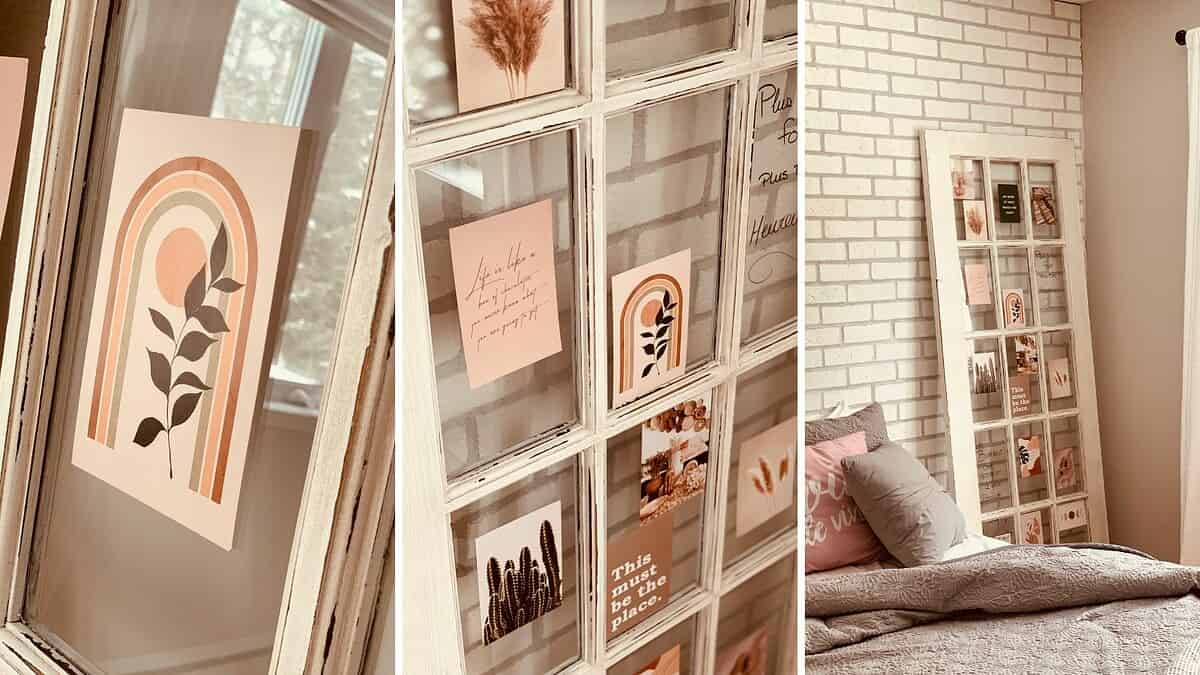
How to Transform a Door in-to a Picture Frame
In this blog I share with you how to transform a door into a picture frame in a few simple steps. For instance, you
But first let me tell you a
Times have changed a lot and so

Always amazed by these old doors, I started researching to find a unique way to give them a second life. It was then that I realized that there is a great alternative to save them, that of transforming them into frames to display beloved photos. I was immediately won over by this option, knowing that a corner of my house was just waiting for my idea to decorate it.
What a beautiful and daring way to decorate a space, allowing us to display our most beautiful memories, so that we can remember these magical moments day after day. And what fun I will have whenever I change the decor, simply by changing the photos.

How to Transform a Door in-to a Picture Frame
First, to complete this project I filled the hole from the old handle using filler. I also cut the base of the door to get the same width on all four sides. Once these steps were done, I was ready to move on to painting my frame.
The steps
Step 1
Before
Step 2
It is
In my case, I opted for the Alkyd Water-based Alkyde Primer since my door was stained with a water-based stain.

Step 3
Following these steps, I was ready to
Step 4
After the paint was finished, I sanded the corners and embossments to age the door and give it a farmhouse look that suited my current style perfectly.
Step 5
I now had to protect my door. To make it look even older, I applied Colorantic’s natural beeswax.
Before applying the Antique Brown wax, I applied natural beeswax all over. Whithout a doubt his made it easier for me to apply the brown wax. The XL round brush is excellent for applying wax to large areas and I used the 16mm brush for the brown wax.

In Conclusion
So this is my first finished project and I’m more than happy! I can now enjoy my new unique decorative element that will be the envy of all my guests. In addition, I can hang it horizontally or vertically and put family portraits, good times spent with friends, trips or simply fabulous photos of breathtaking landscapes. I am going to entertain myself by letting my imagination travel with this giant frame.
Jour our Colorantic English Facebook Group
Follow Us on Social Media:
Newsletter
Facebook
Instagram
Pinterest
Etsy
Amazon Canada
YouTube
Tiktok
Related Posts