My New Coffee Bar
In recent years, the “coffee bar” has become a huge trend, and many people want to have their own. We see them in all shapes and sizes, each as unique as the last. For a long time, I had been looking for an affordable piece of furniture that would enable me to create a “Coffee Bar” that would undoubtedly appeal to my customers. Having already come up with an idea for the transformation, it was when I saw this TV stand in the classified ads, just a stone’s throw from my home, that I knew I’d found the rare gem I needed for this project.
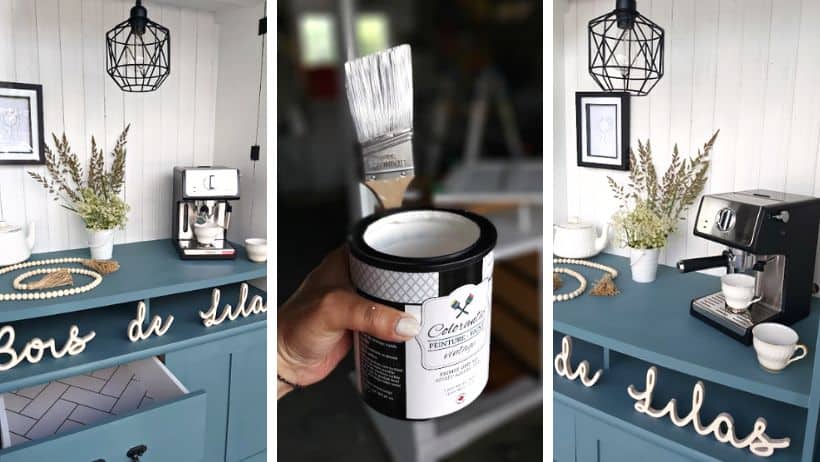
When Colorantic released its new colour, Zen, I fell in love with this gorgeous shade. When I saw the furniture, I knew immediately that this new colour, which is a favorite of mine, would suit it perfectly.
If you would like to own your own coffee bar, let my project inspire you!

The Products Used
- Colorantic Matte Top Coat Varnish
- Colorantic Oil-Based Primer
- Colorantic Chalk-Based Paint: Zen
- Colorantic Chalk-Based Paint: Cotton Ball
- Colorantic Velvet Foam Roller
- Colorantic Synthetic Oval Brush #6
- Colorantic Snow White Brush
- Colorantic Sandblasting Block
- Colorantic Granular Hand and Brush Cleaner
- Self-adhesive wallpaper
- Pneumatic nailer and finishing nails
- ModPodge glue
Preparation
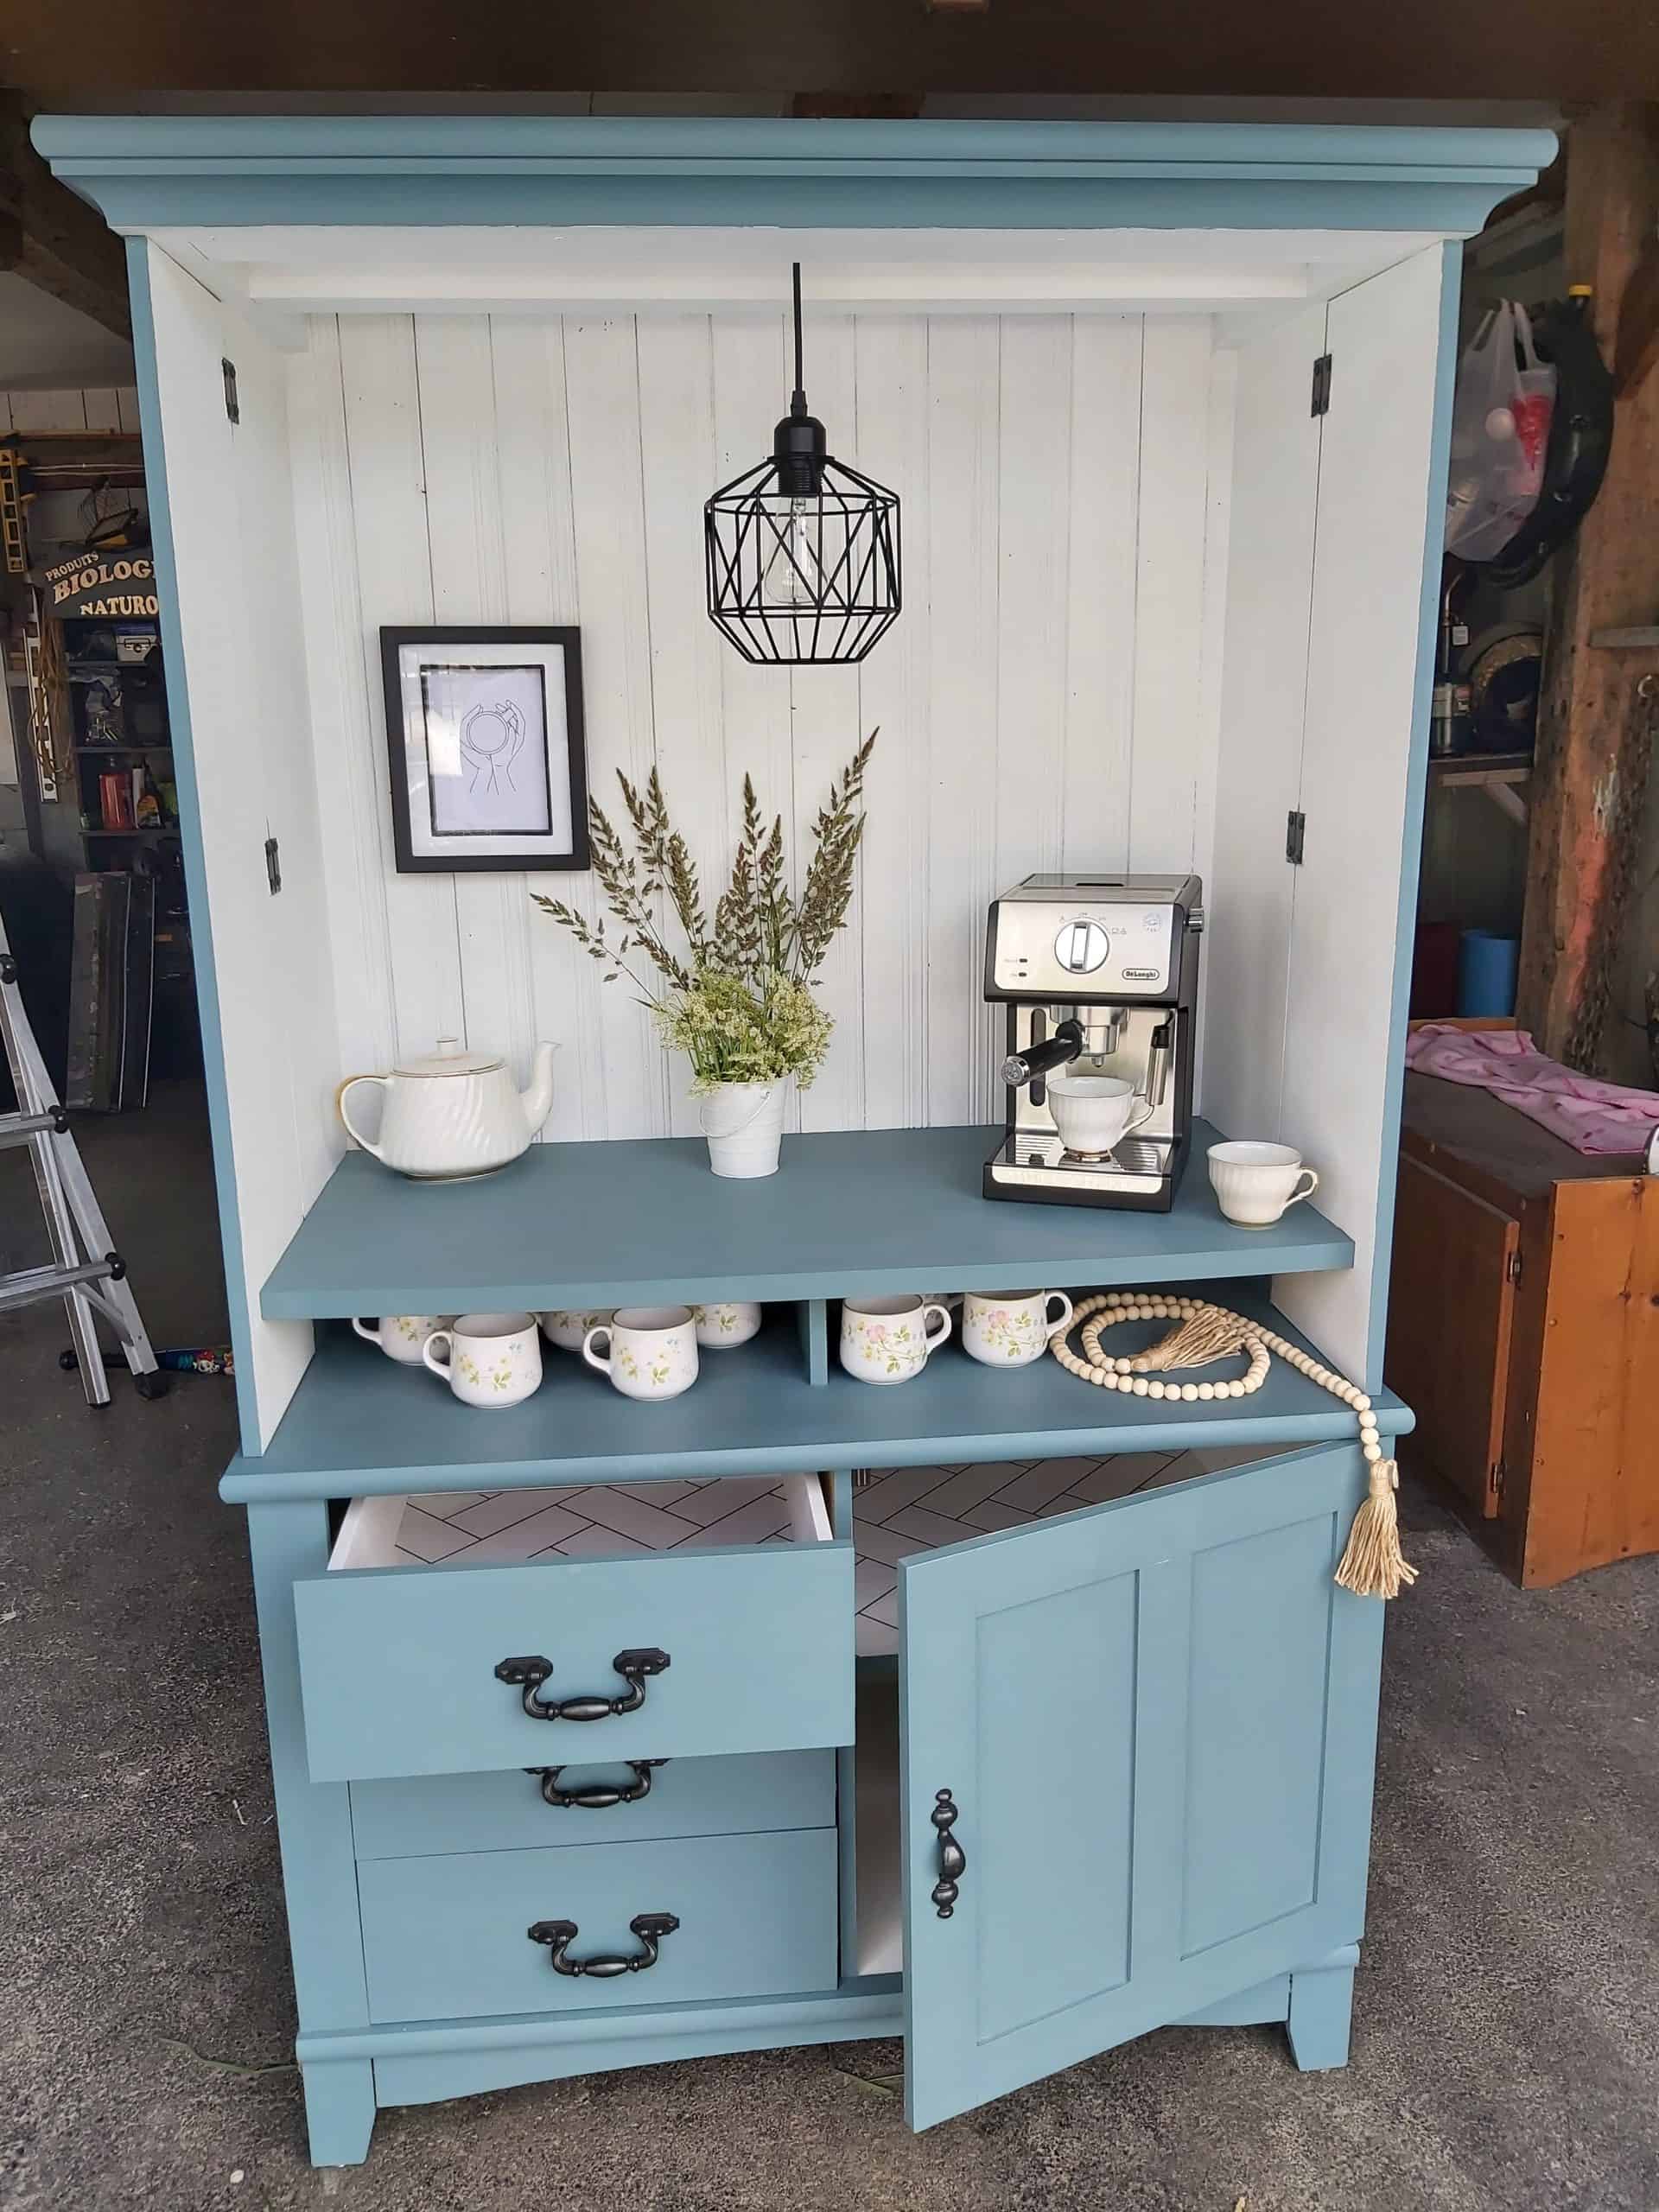
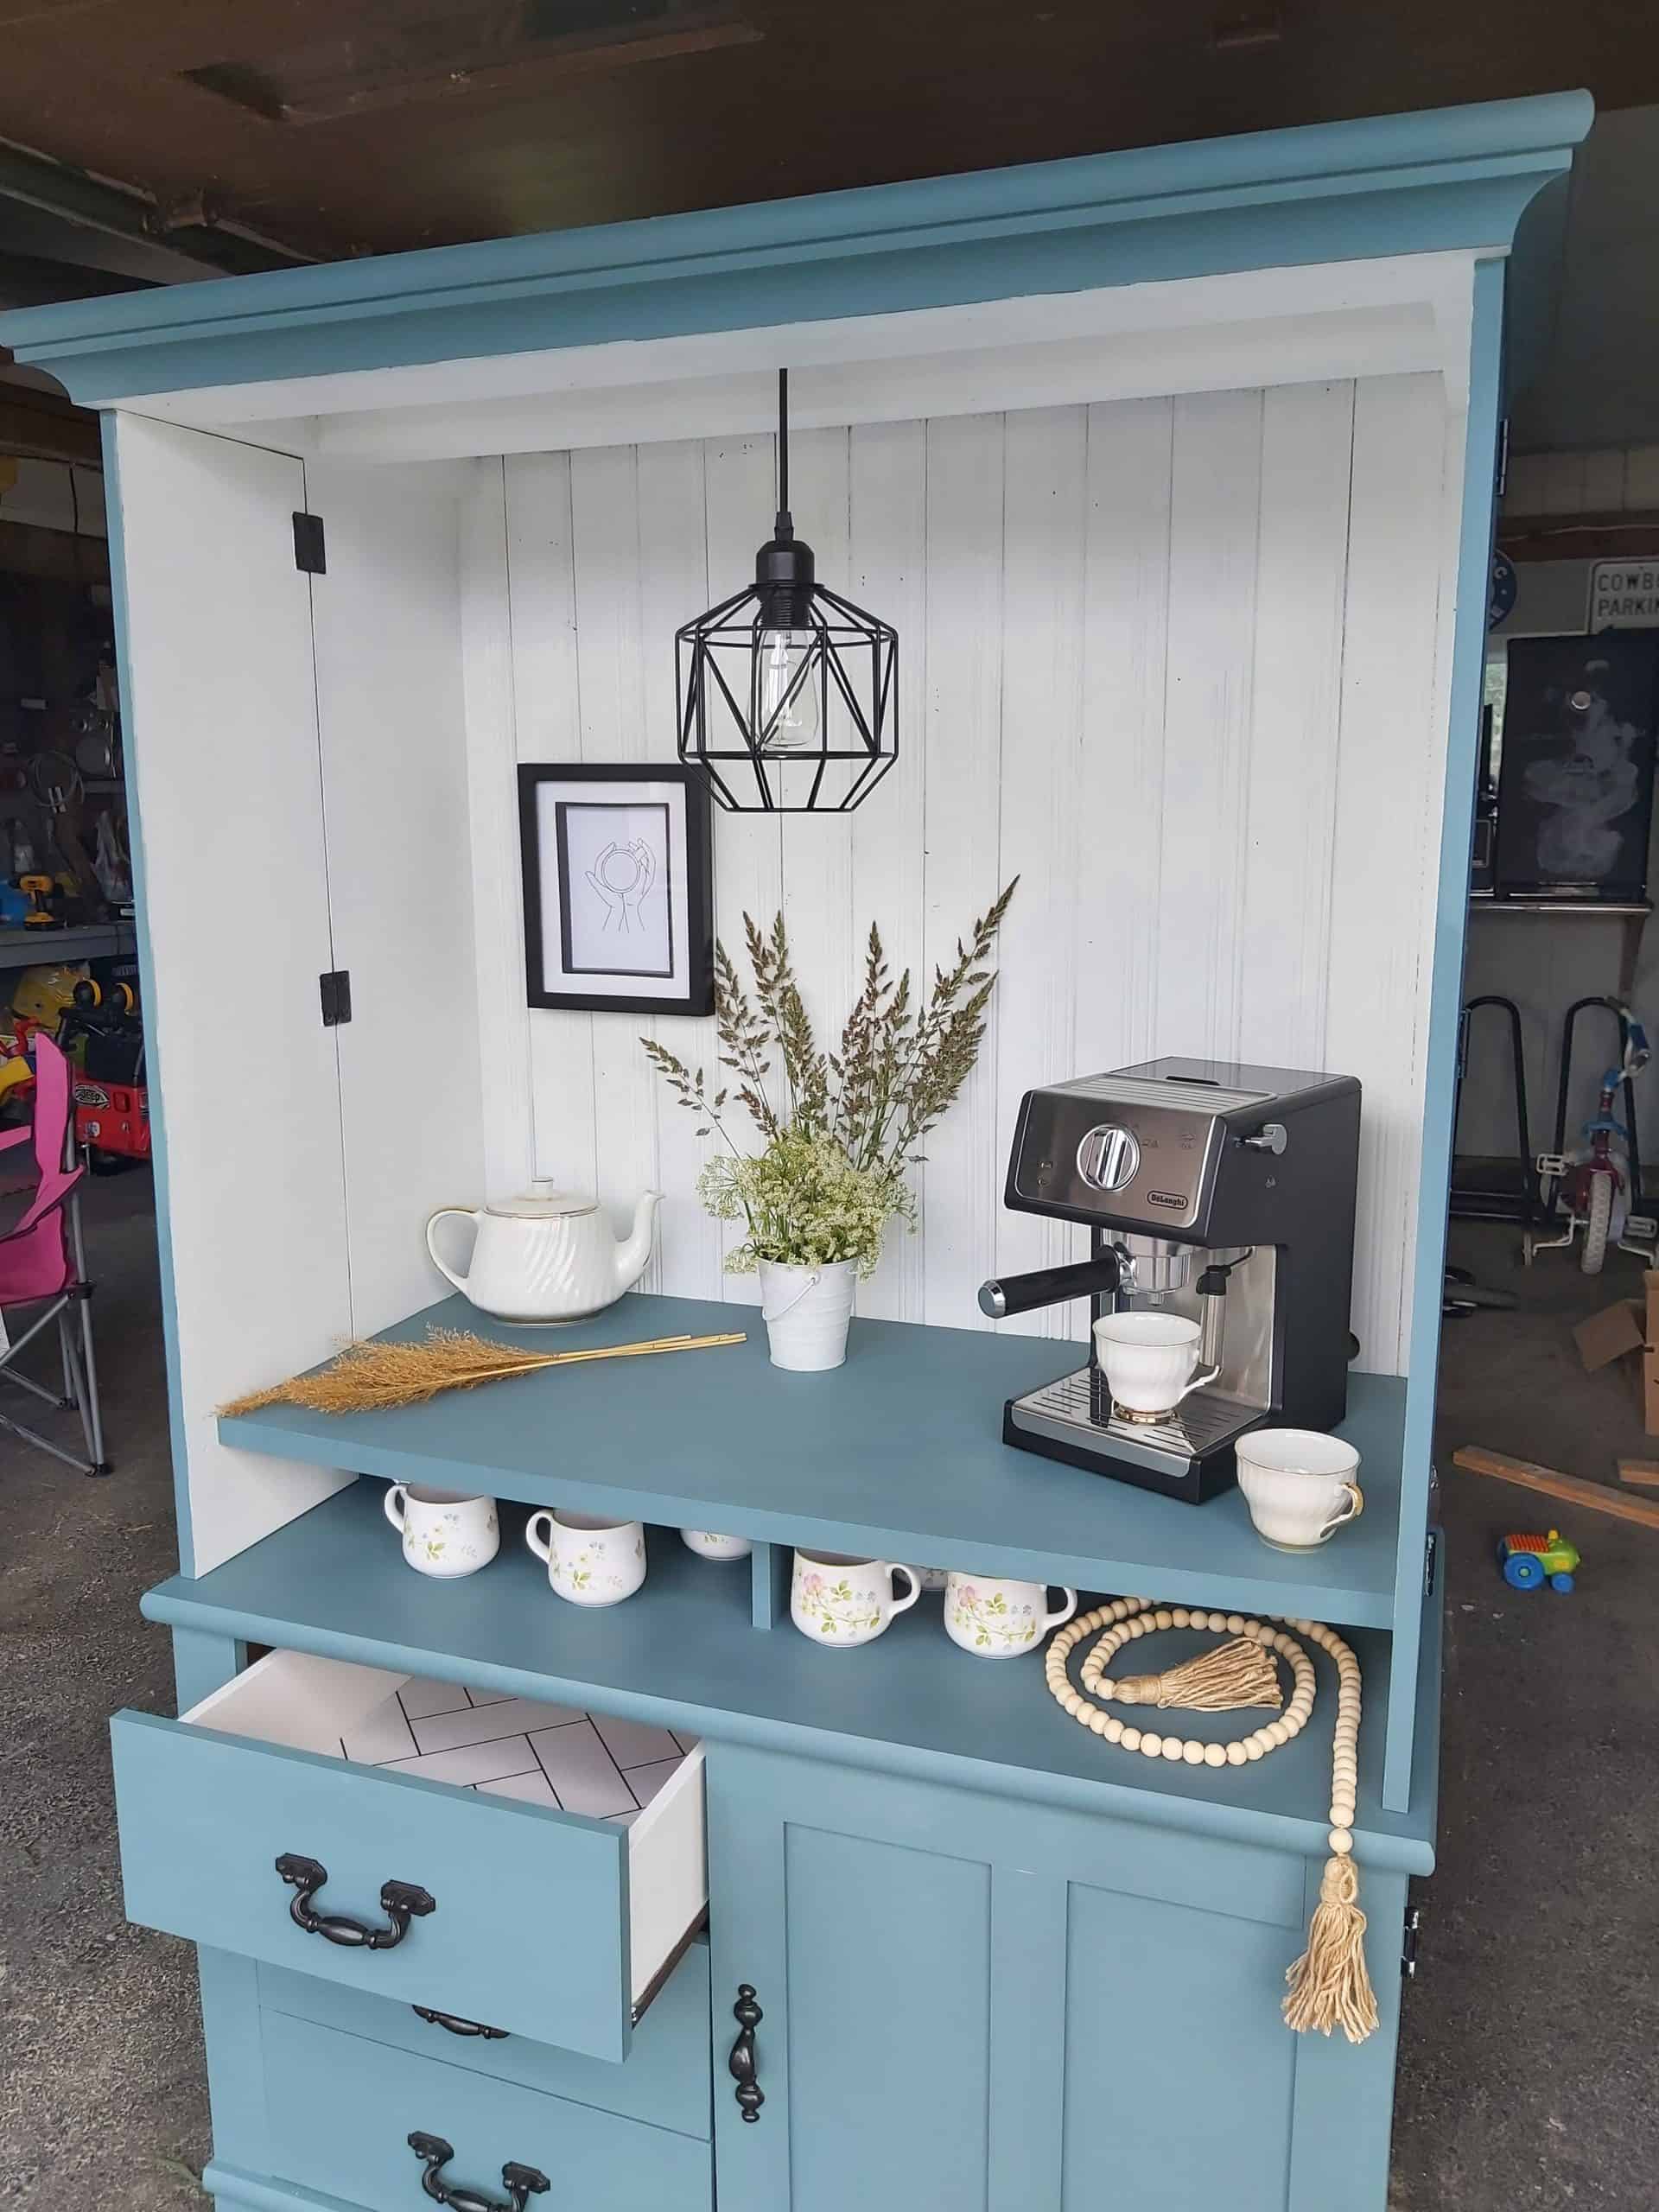
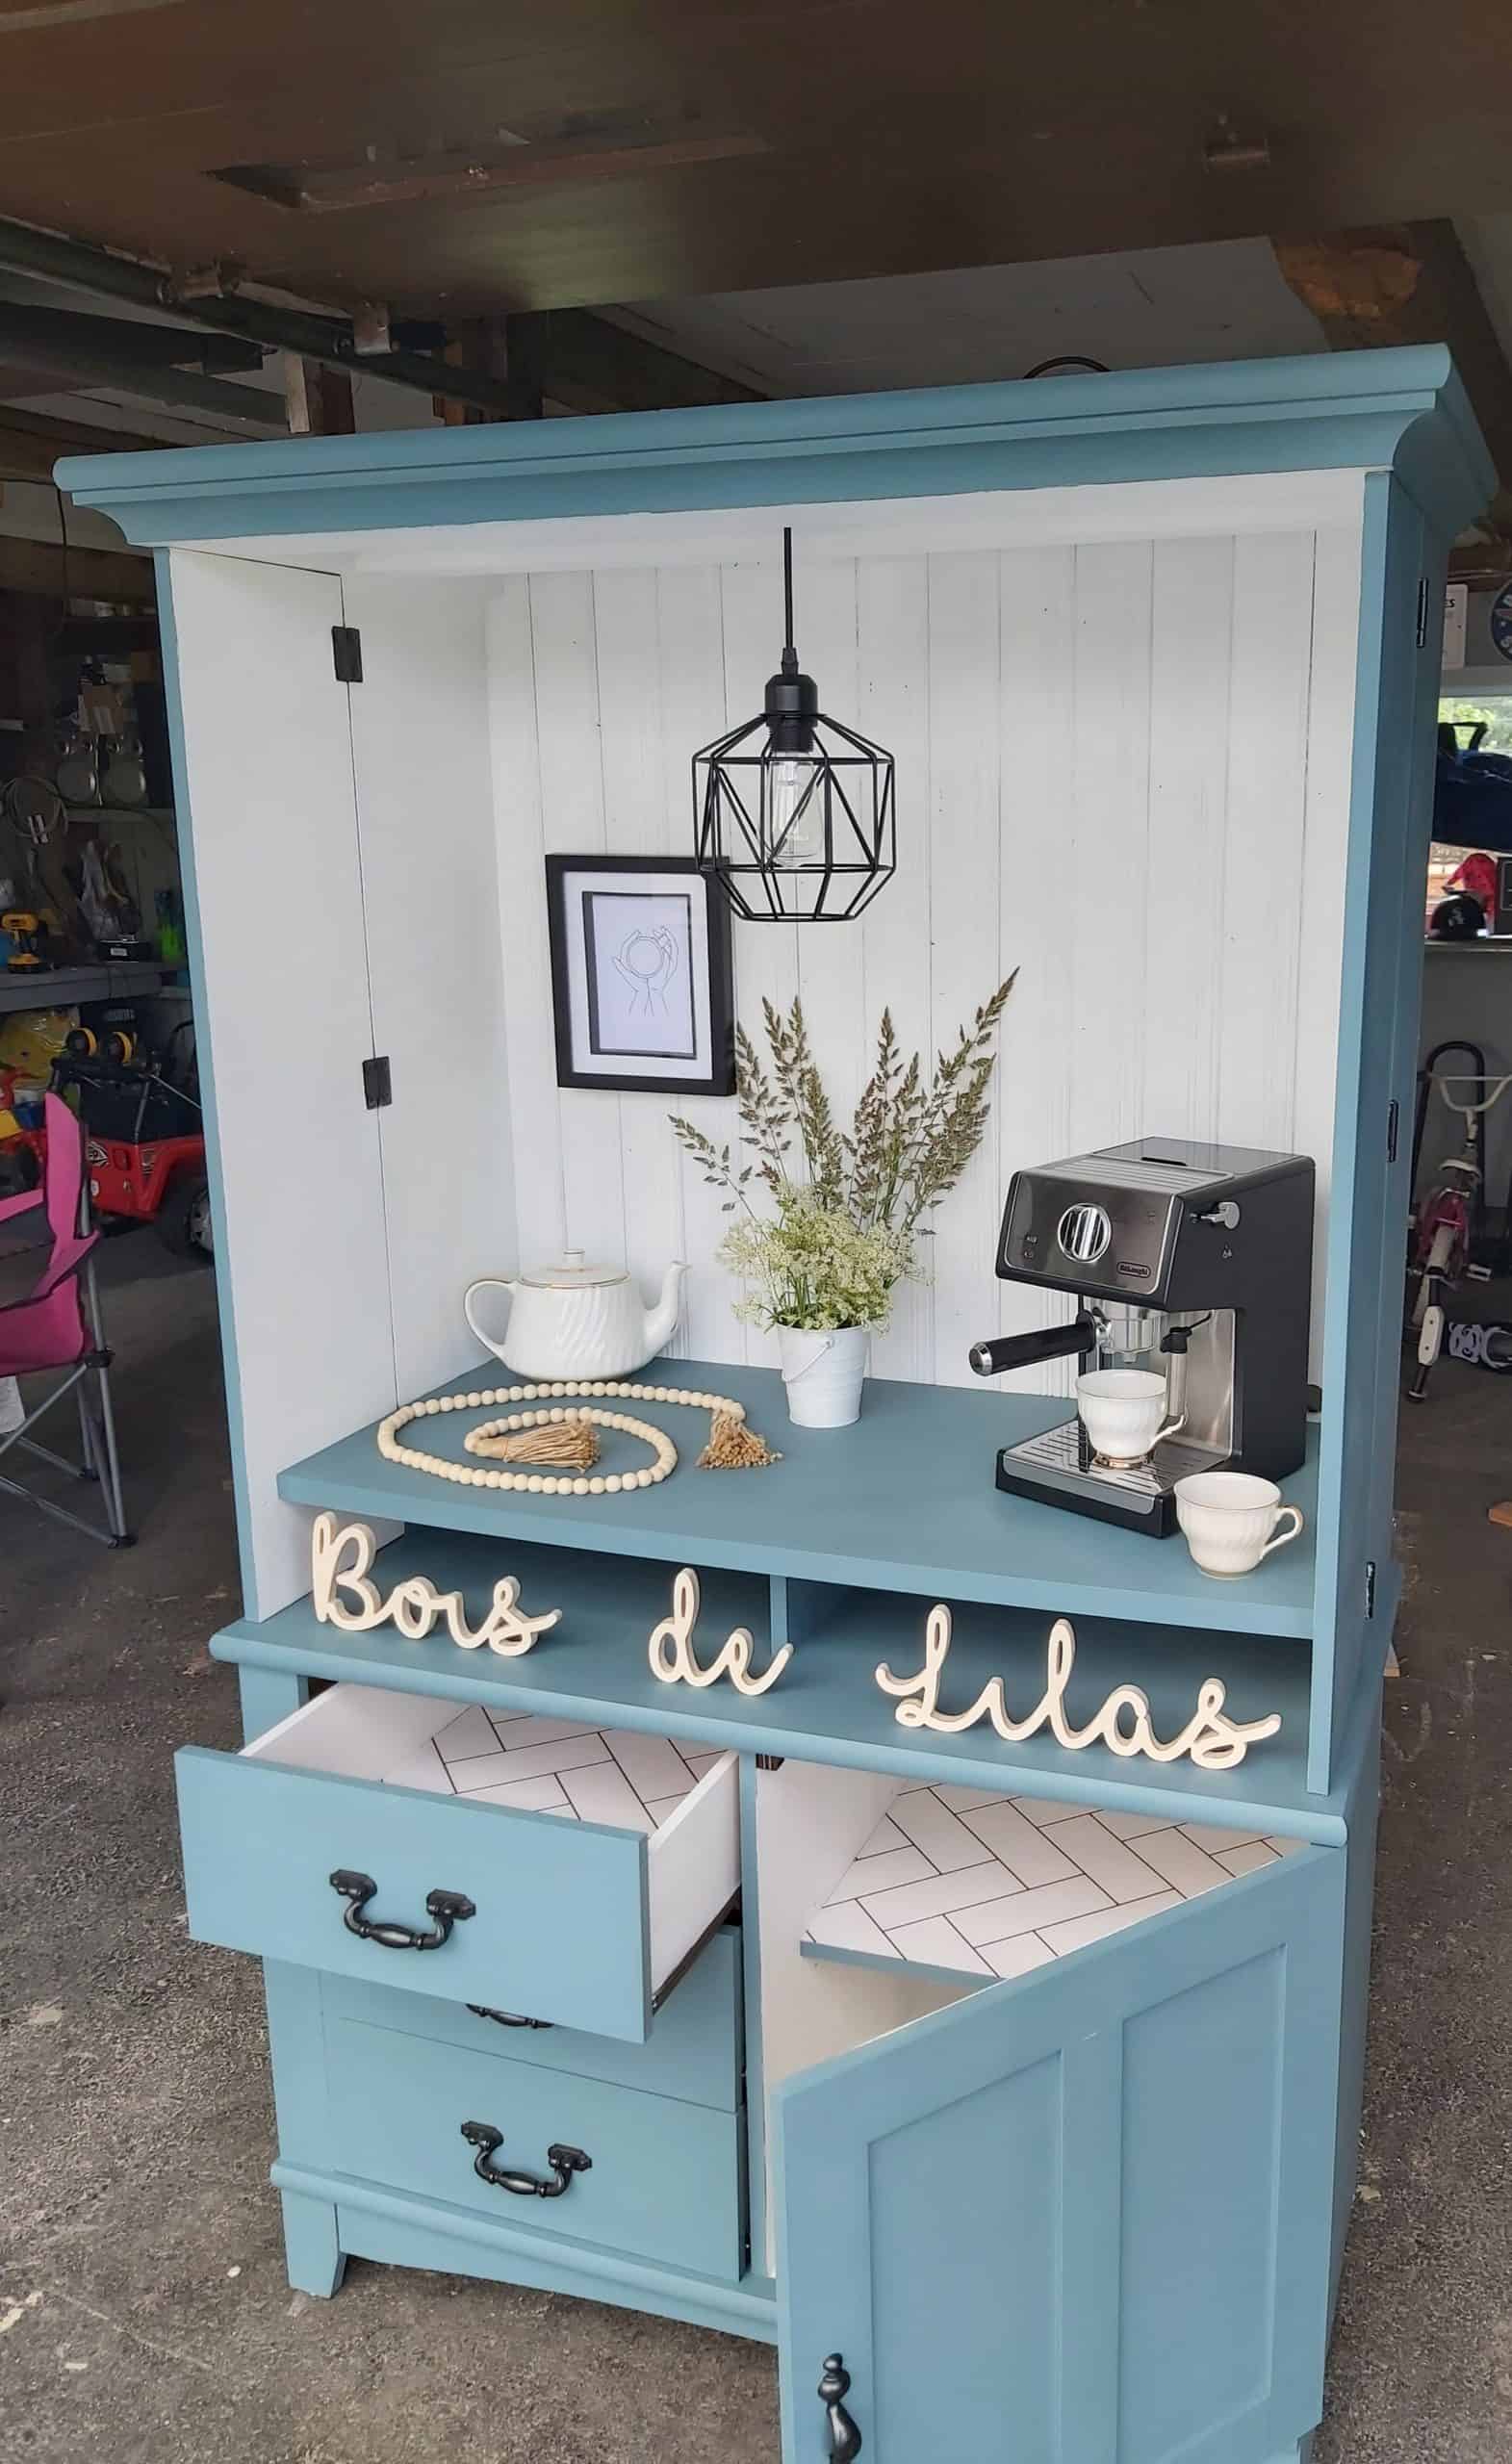
This huge piece of melamine furniture was really heavy. As I wanted the new design to reveal the interior, I removed the two large doors at the top.
Once the doors had been removed, I prepared all the surfaces, which in my opinion is the most time-consuming and laborious step, but undoubtedly the most important for a lasting job.
I removed the bottom of the cabinet and all the hardware. Then, I cleaned all the surfaces and handles with Colorantic Cleaner and Varnish Remover. I sprayed the cleaner on all the surfaces and left it on for thirty minutes. Once the resting time was over, I wiped the surfaces twice with a warm cloth to make sure all residue was removed.
Using the sanding block, I sanded all the surfaces to allow the paint to adhere properly. I made sure to dust it off before continuing my work.
Since the cabinet was made of melamine, I applied a coat of Colorantic Oil-Based Primer to ensure that the paint would adhere well.
Painting
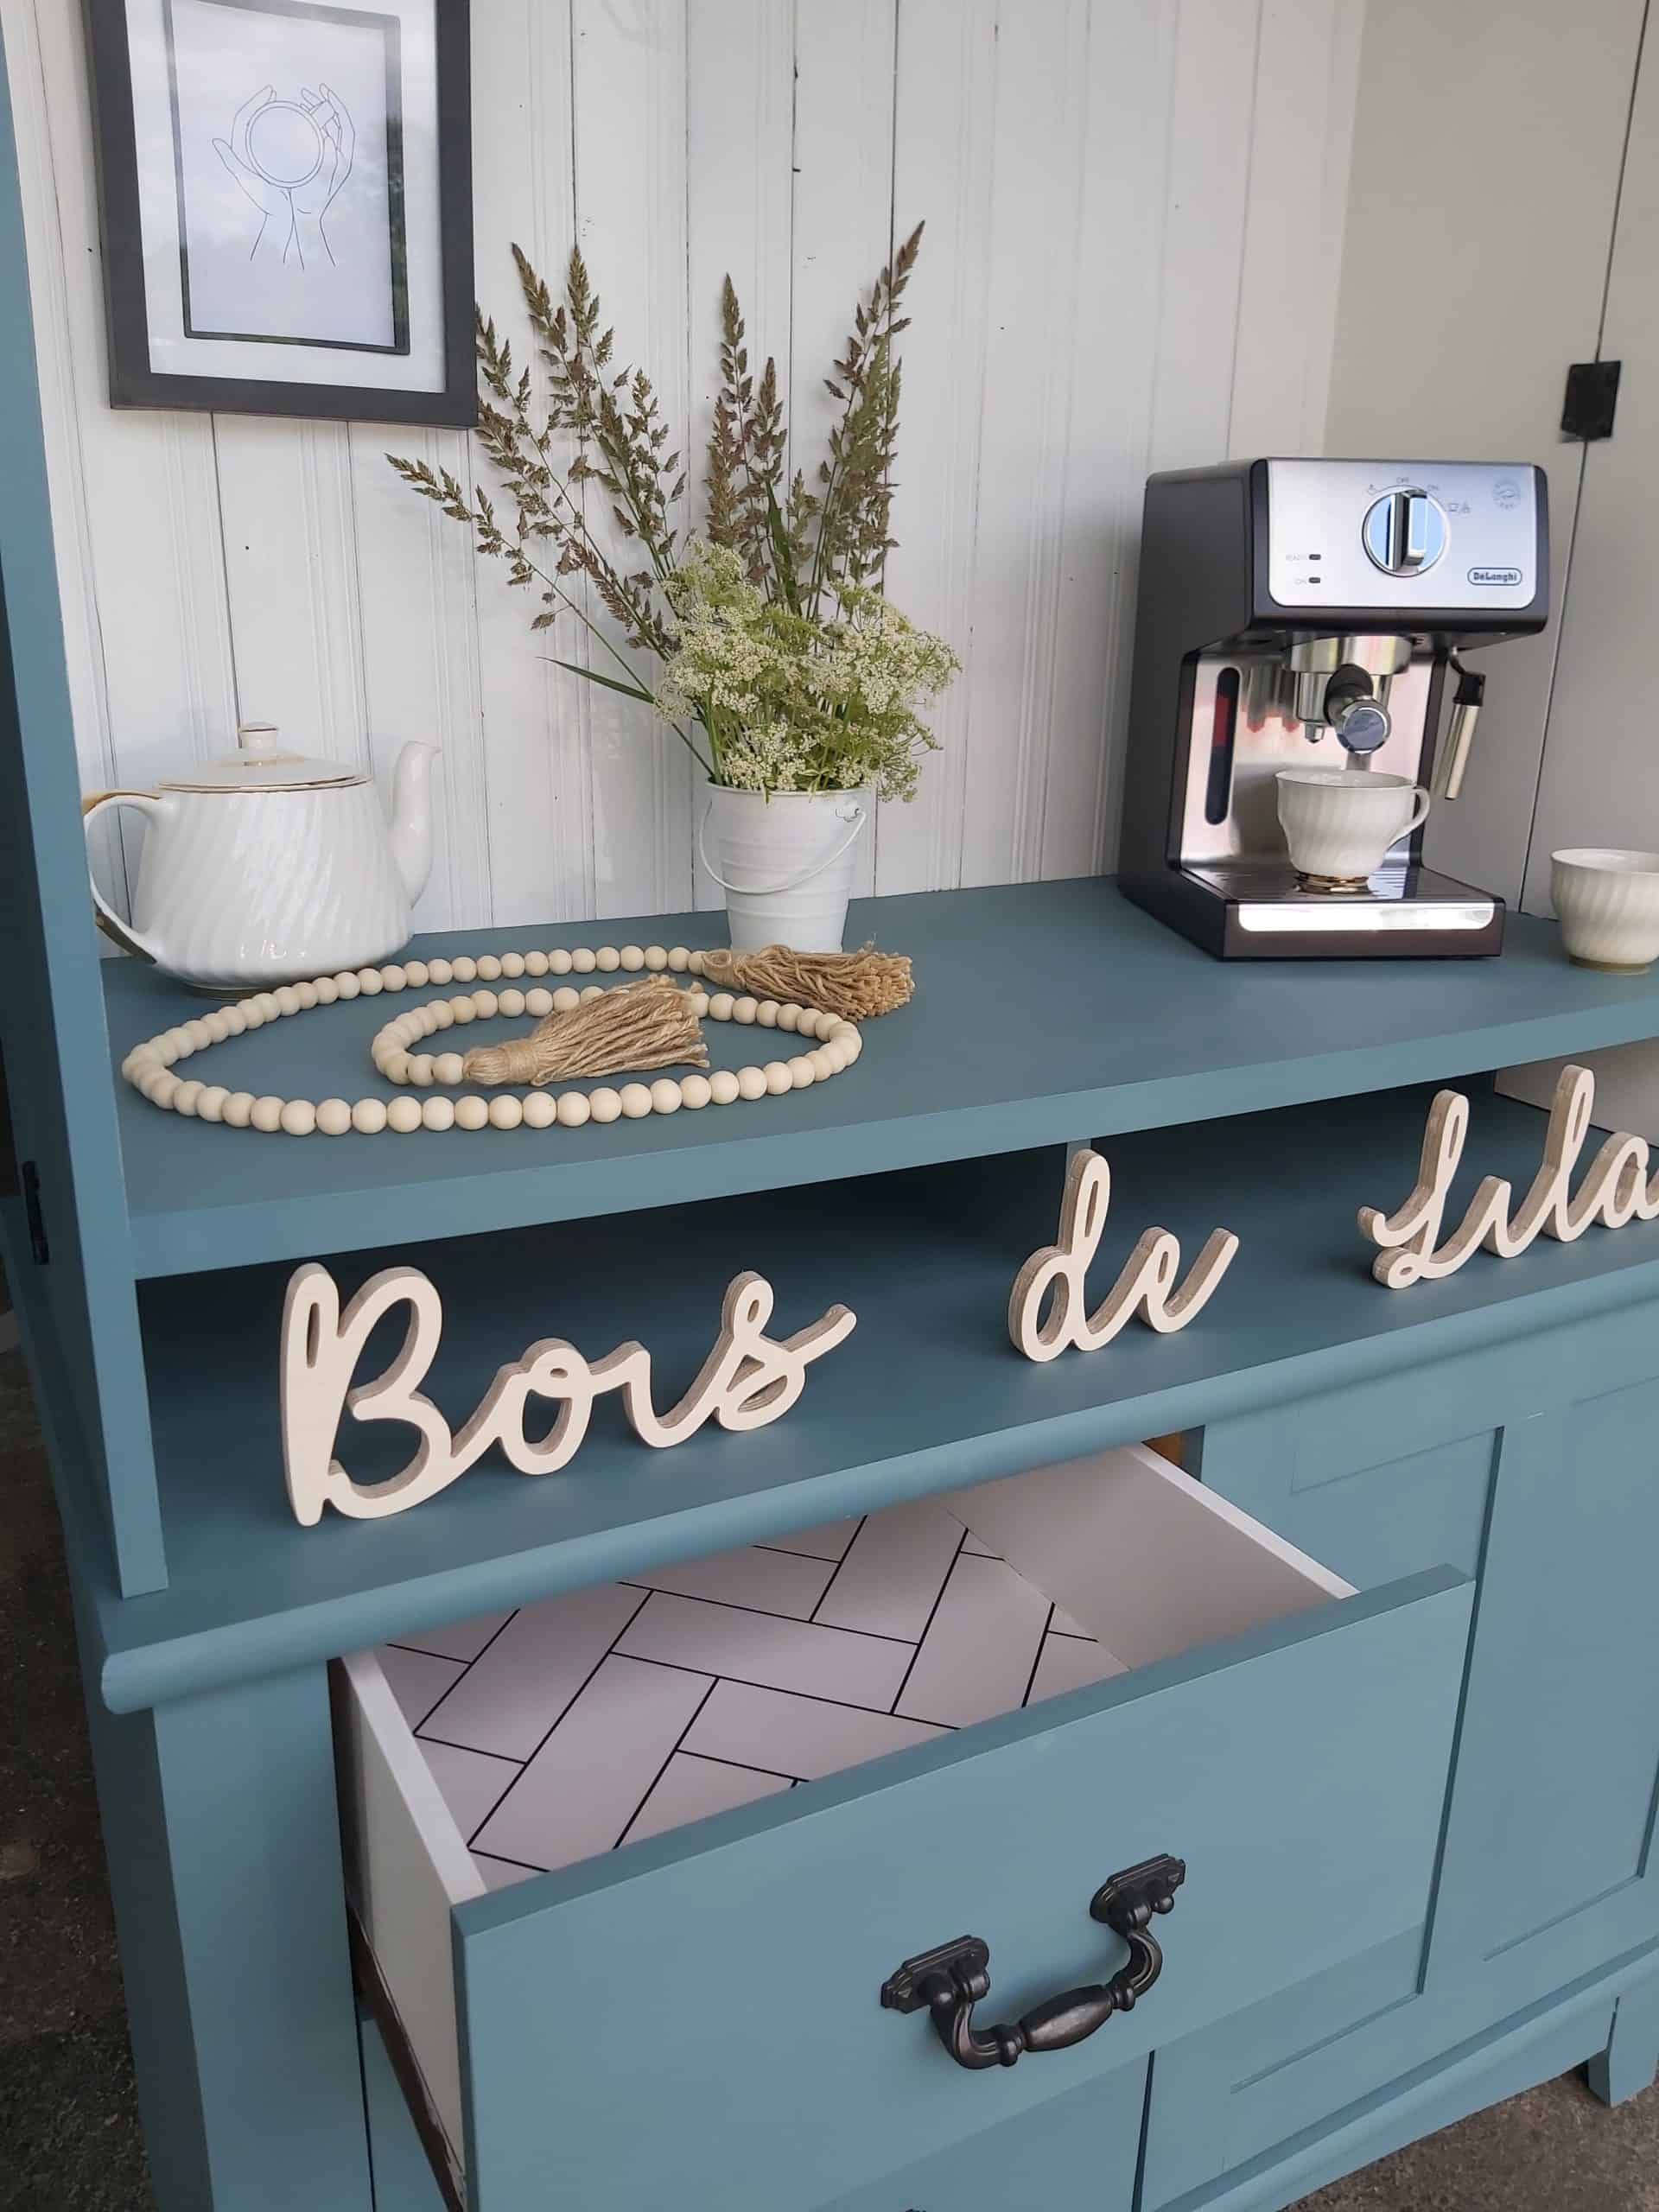
Using the foam roller, I applied three coats of the colour Zen, and for smaller areas I used the synthetic oval brush #6. I thought it was important to paint the top as well, because I didn’t know in which house it would end up. I also applied two coats of Cotton Ball, on the sides of the drawers and on the inside surfaces of the cabinet.
During the drying time, I was able to carry out the following steps:
– Paint the handles black with spray paint
– Measuring and trimming wood slats salvaged from an old bedroom
– Measuring and trimming wallpaper
– Glue and nail the side panels.
For the bottom slats, I applied a coat of oil primer and two coats of cotton ball. I installed them vertically, taking care to glue them together and adding two finishing nails at the ends.
Personalization
To personalize my “Coffee Bar”, I applied white wallpaper with a touch of black to match the black accessories and handles. To apply the wallpaper, I first applied Mod Podge to the surfaces using the Colorantic’s Snow White Brush, and also applied Mod Podge to the reverse side of the wallpaper. A cloth and spatula were needed to remove air bubbles.
I also took care to drill holes to let the light and coffee-maker wires pass through, making the whole thing visually pleasing.
Now you’ve reached the most exciting stage: placing the accessories, installing the lighting and letting your imagination run wild to make your coffee bar your own!
Here’s a video summary of the project. Feel free to subscribe to the Youtube channel and like the video!
I invite you also to check out all of this blogger’s work.
Related Posts