Refreshing a Dining Room Buffet
I really liked our new dining room, although I found it a little dull with the dark brown maple furniture.
I was looking for a simple and inexpensive way to give it some shine. Sitting comfortably sipping herbal tea, inspiration appeared, and I thought of upgrading the buffet with Colorantic products. A few days later, I was ready to start my project.
Read on for all of the steps I followed.
List of Products Used
- Colorantic Cleaner and Varnish Remover
- Colorantic Oil-Based Primer
- CoIorantic Chalk Paint: Ballerina
- Colorantic Oval brush 55mm
- Colorantic Oval Purple Brush, Synthetic Bristles #6
- CoIorantic Two-Grain Sanding Block
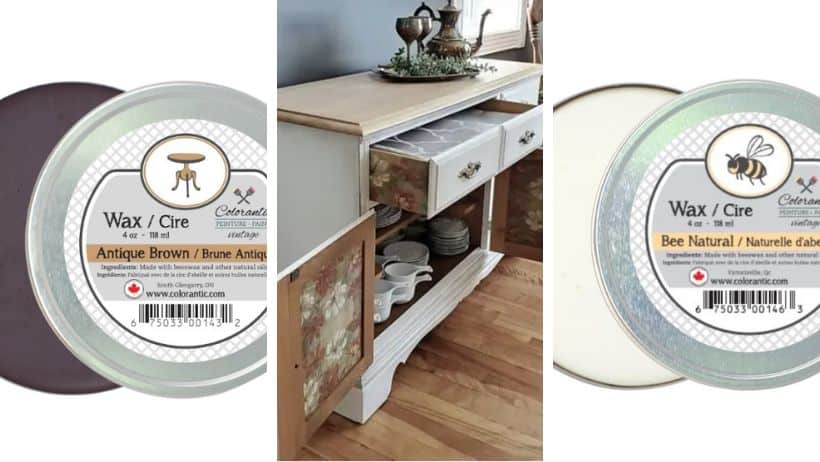
- CoIorantic Waxes: Charcoal, Antique Brown, Grey Storm, Bee Natural
- Colorantic Velvet Foam Roller
- Colorantic XL Round Brush
- Colorantic Round Brush, Silk Bristles 16mm for Colorantic wax (3)
- Colorantic Tangerine Scented Hand and Brush Soap
- 100 grit sanding paper
- Blue workshop paper towel
- T-shirt style cloth (make sure it doesn’t foam)
- Napkins
- Mod Podge
Step 1 – Preparing the Furniture
- Completely sand the buffet top down to the natural wood.
- Only remove the handles.
- Spray the cleaner and varnish remover on the furniture, spread it well on all surfaces using a paper towel and leave to act for 30 minutes.
- Rinse very well twice to remove all residue.
- Lightly sand the buffet.
- Apply primer using the foam roller and wait the recommended drying time.
Now the fun begins!
Step 2 – Painting
You are now ready to apply the colour, Ballerina, using the velvet foam roller.
To apply the second coat, use the 55mm and purple oval #6 brushes.
Wear the finish using the sanding block, sanding paper and a damp cloth (t-shirt).
Step 3 – Surface Protection
The next day, using the XL round brush, on one section at a time, apply the wax, Bee Natural, on all surfaces and make sure to polish it well using a paper towel or cloth (t-shirt). It is very important to change paper towels (or cloth) after each section. Application of clear wax, Bee Natural, first will allow you to easily apply dark wax and make corrections as needed.
Step 4 – Polish It
You are now ready to proceed with the coloured wax. Use two 16mm round brushes, and randomly, apply the colours (Grey Storm and Antique Brown) to the desired surfaces. You will obtain beautiful results by superimposing them. Let your imagination run wild to create stunning effects. It is important to accentuate the recesses by applying brown wax.
Rest assured, if you are not completely satisfied with the result, it is always possible to correct the shading by reapplying natural wax.
Once finished, do not wipe with a paper towel or cloth, the wax will harden on its own, this may take up to 30 days as the dark wax has not been buffed.
Step 5 – The Buffet Top
Apply a layer of clear wax, Bee Natural, over the entire surface.
Apply the other three colours of wax until the desired colour is achieved.
Step 6 – Decoupage Techniques on the Doors and Drawers
Cut the napkins to keep only the printed part.
Apply a layer of Mod Podge to the surface, wait about 2 minutes and gently place the napkin.
Once dry, apply two to three coats of Mod Podge on top of the towels to protect them and facilitate cleaning.
Upgrading the buffet, removing the table panel, bringing out a tablecloth that had been stored in the cupboard for several years and replacing some decorations, was the perfect combo to give a whole new look to our chic country-style dining room.
For more decorating ideas, join Trucs/Décos en tout Genre !

Diane Lavoie
Related Posts