Antiquing a Side Table
It’s my love for Antique furniture restoration which inspired me for this project. This massive round table has a lot of detail and I wanted to give it a clean style while still giving it a unique appearance.
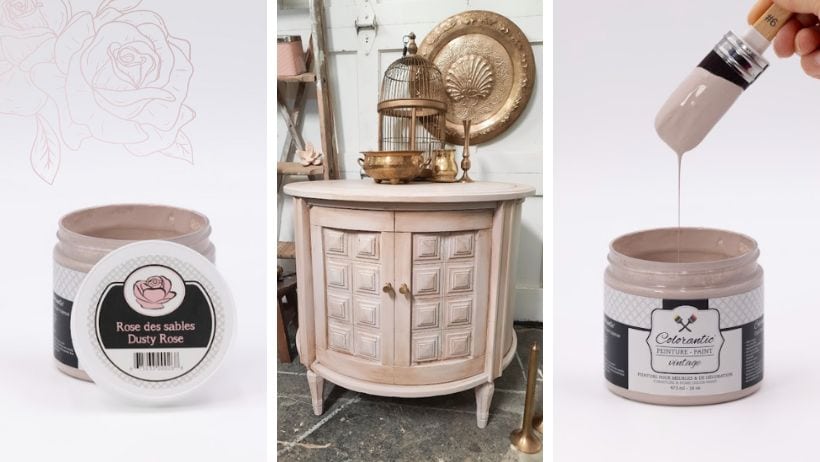
Having never used the magnificent colour, Dusty Rose, I wanted to use it for this project. This soft shade is reminiscent of romanticism and I found that it suited the unusual style of this piece of furniture perfectly.
List of Products Used
- Colorantic Chalk Paint Dusty Rose
- Colorantic Antique Brown Wax
- Colorantic Clear Natural beeswax
- Colorantic Sanding Block
- Colorantic Cleaner and Varnish Remover
- Colorantic Snow White Brush
- European style oval brush in beige bristle Colorantic
- Workshop towel
By reading what follows, you will discover all my tips for this original transformation.

Preparation
The least interesting step, but undoubtedly the most important for long-term sustainable work.
A good cleaning is essential and to do this, nothing better than the Varnish Cleaner and Remover from Colorantic. This helps remove all the dirt left behind by time.
- Make sure to spray the cleaner on all surfaces. Leave it on for 30 minutes and during this time you can spray it again. Once the time has elapsed, it is very important to rinse thoroughly using a warm cloth.
- Once cleaning is complete, you can don light sanding only to scratch, to allow the paint to adhere very well. The use of coarse grain sanding blocks is recommended. Be sure to dust very well before continuing work.
* When the old finish is oil-based, it is strongly recommended to apply a coat of oil-based primer, as this allows for the transition from the old oil-based finish and the new Colorantic paint which is water-based. Since the finish on my furniture was water-based, this step was not necessary.
Painting
The side table being massive, the colour Dusty Rose, suited her perfectly to soften her shapes. The original colour being in dark salmon tones, a single coat of the beautiful pale pink, Dusty Pink, was enough given that the Colorantic paint is very covering.
The European oval brush being my favorite for this kind of work, is the one I chose.
Once the paint was completely dry, I sanded everything very lightly using the small grain side of the sanding block, making sure to dust very well once the task was finished. This step allowed me to soften my brushstrokes and properly prepare the furniture to receive the wax.
Finishing
Using the European style oval brush, I applied the clear wax, Natural bee, on all surfaces, making sure to polish it well using workshop paper towels.
The application of the clear wax, Natural bee, serves to protect the furniture, but it also serves to facilitate the application of dark waxes which are drier and therefore more difficult to spread. With the clear Natural beeswax, you will also correct mistakes made with dark waxes. You are not satisfied with the result, just apply a little Clear Natural beeswax on the dark wax to erase it and allow you to start your work again.
I chose the Snow White paint brush to apply the Antique Brown wax to the edges and all the small details of the furniture. When applied in a thin layer, this brown looks a lot like gold.
Wax drying time varies, it can take seven days and sometimes even longer, depending on the humidity level in the house.
The small original gold-coloured handles harmonize very well with the new colour Dusty Rose.
Here is a very beautiful, unique vintage table that I am very proud of. It will wonderfully furnish a space in a little girl’s bedroom.
")
Related Posts